


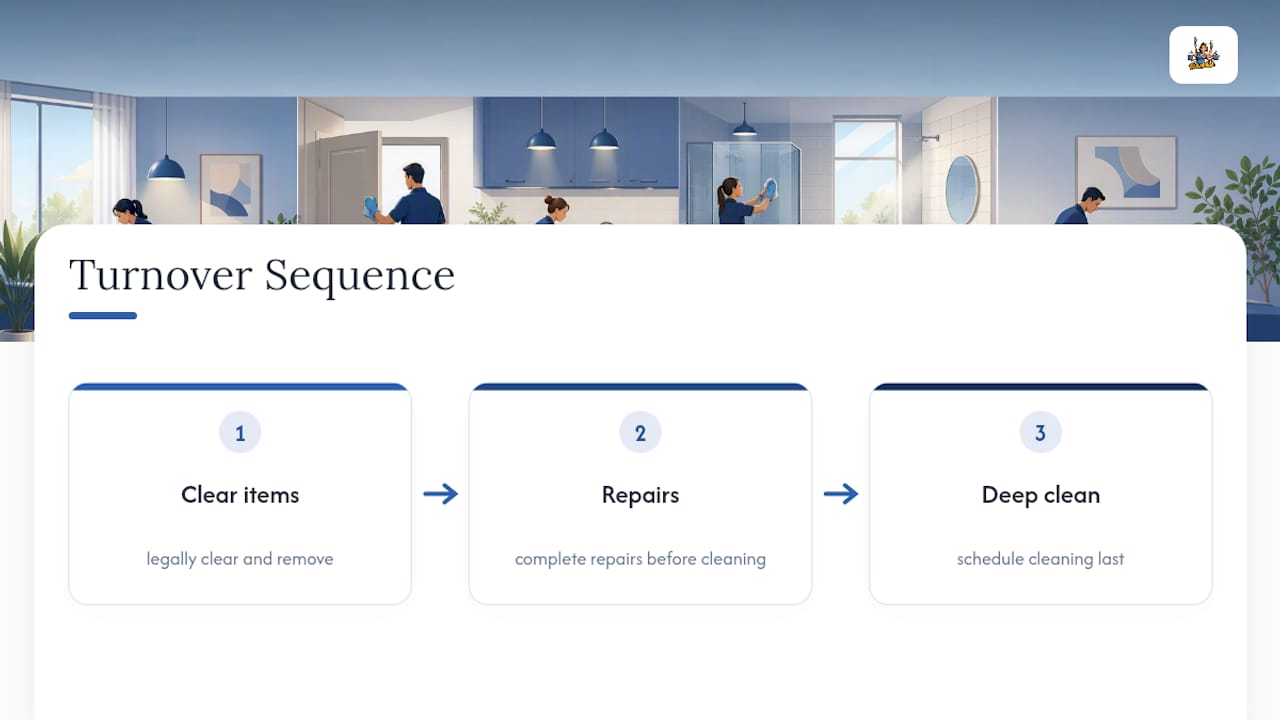
Inspect and photograph the unit the moment you get the keys back, before any cleaning or repairs start. Sequence the work: repairs and paint first, then flooring fixes, then the professional turnover clean, then a final walkthrough. This order stops re-cleans, protects your case in deposit disputes, and gets the unit rentable faster. Require the cleaning crew to hand back post-clean photos and a signed checklist before you release final payment.
TL;DR:
- Inspect and photograph the unit immediately upon receiving the keys to establish a baseline before cleaning or repairs begin.
- Sequence the work by completing repairs and painting first, then flooring fixes, followed by cleaning, to avoid re-cleaning and delays.
- Require the cleaning crew to provide post-clean photos and a signed checklist as proof of completion and to support deposit disputes.
- Include clear, detailed scope, insurance requirements, re-clean policies, and acceptance criteria in your cleaning vendor contract.
- Conduct a final safety check on systems like smoke detectors, faucets, and HVAC before listing the unit to prevent costly tenant complaints shortly after move-in.
Table of Contents
- A Landlord’s Cleaning Checklist Between Tenants, Room by Room
- How Long Does a Turnover Clean Take?
- What Should Be in Your Cleaning Vendor Contract?
- Functional Safety Checks Before the Next Tenant Moves In
- Building a Paper Trail That Survives a Deposit Dispute
- What to Do With Items a Tenant Leaves Behind
- Pest Control Between Tenants: What to Check and When
- Getting a Fair Deal on Your Cleaning Service Contract
- What Turnover Cleaning Actually Looks Like on the Ground
- Let Octomaids Handle Your Next Turnover
- Sources
- FAQ
A Landlord’s Cleaning Checklist Between Tenants, Room by Room
A turnover clean is not a light dusting. It’s a top-to-bottom reset that touches every surface a new tenant will judge on day one, and it typically runs longer than a routine maintenance visit because of everything hiding inside appliances and behind fixtures, according to Levdok Services. Hand your cleaning crew this breakdown as a scope of work, not a vague “clean the apartment” instruction.
Kitchen. The oven interior needs full degreasing, not a wipe-down. Pull the refrigerator forward, clean behind and underneath it, and check the door gasket for mold. Empty every cabinet and drawer, wipe the backsplash and range hood filter, and run the garbage disposal with a drain treatment to kill lingering odors.
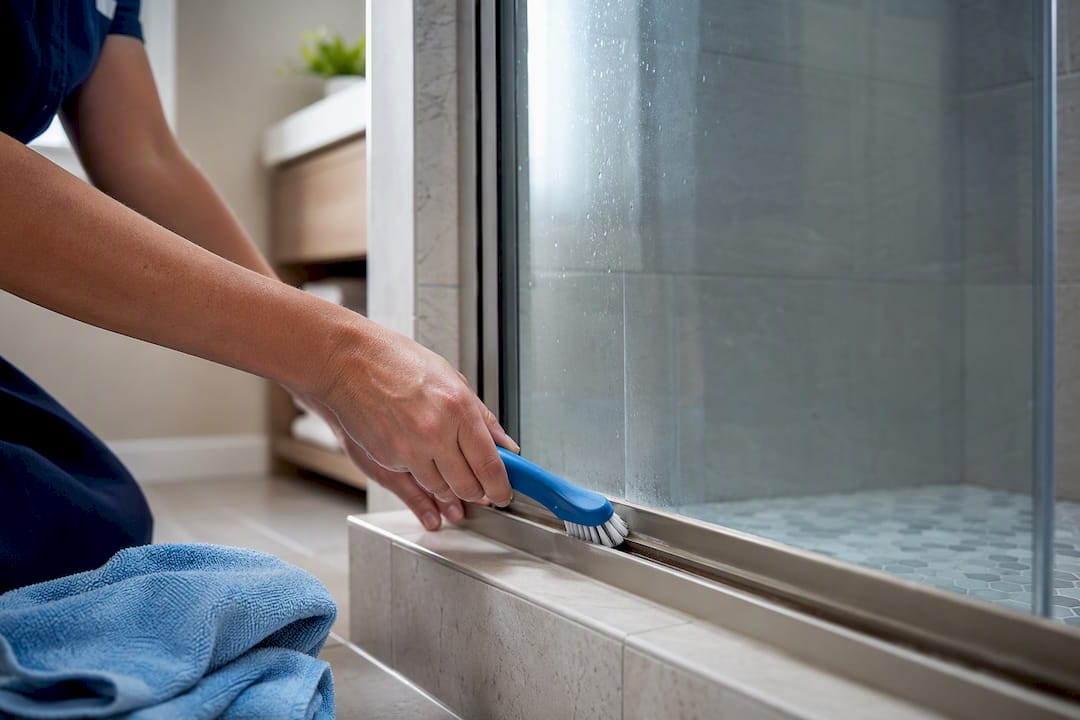
Bathrooms. Grout and tile grout lines are where turnover cleans succeed or fail visually. Scrub the tile, inspect caulk lines for gaps or mildew, clean the exhaust fan cover (it collects more dust than owners expect), and check behind and around the toilet base, an area Levdok Services flags as one of the most commonly missed spots that triggers tenant complaints. Shower door tracks need a dedicated pass, since soap scum builds up in the channel long before it’s visible on the glass.
Living areas and bedrooms. Baseboards, window tracks, blinds, and ceiling fan blades collect dust that a quick vacuum-and-mop pass will not touch. Check closet shelving for leftover shelf liner or debris, and spot treat wall scuffs before deciding whether a full repaint is warranted.
Floors and carpets. Vacuum and mop hard surfaces, but carpets need a judgment call. For tenancies over a year, carpet extraction is usually worth scheduling regardless of visible condition; if there’s pet odor, staining, or wear that extraction won’t fix, replacement is often cheaper long term than repeated deep cleans, a point Titus GC makes clearly when weighing clean-versus-replace decisions. Odor from smoke or pets sometimes sits in the subfloor, which no surface cleaning will resolve.
Secondary areas. Don’t skip the laundry room, garage, and exterior entry. Vent covers and HVAC return grilles collect dust that affects air quality for the next tenant, and any lingering odor needs to be addressed at the source, not masked.
- Oven interior and broiler drawer
- Refrigerator interior, gasket, and drip pan
- Behind and around the toilet base
- Window tracks and blind slats
- Vent covers and HVAC return grilles
Pro Tip: Have the crew start the dishwasher and laundry cycles first, then apply any cleaner that needs dwell time (grout treatments, oven degreaser) before moving to floors. Doing floors last avoids re-tracking dirt across a surface that’s already clean.
How Long Does a Turnover Clean Take?
Timing starts with the inspection, not the cleaning. Walk the unit and build a punch list within 24 hours of getting keys back, and get owner approval on any repair costs before trades start work. Skipping this step is how landlords end up paying for cleaning twice.
- Inspect and document. Photograph every room, note damage beyond normal wear, and finalize the punch list.
- Repairs and paint. Trades go in first. Cleaning before repairs almost always forces a second visit once drywall dust and paint spatter settle everywhere, a mistake Lula calls out as a leading cause of doubled cleaning costs.
- Flooring fixes. Carpet extraction, refinishing, or replacement happens after paint, before the final clean.
- Final turnover clean. The cleaning crew is the last vendor in the unit.
- QA walkthrough. Confirm everything against the punch list before listing the unit.
A properly sequenced turn commonly wraps in three to five days from move-out to market-ready, per Buildium. Expect several crew hours for a small one-bedroom in average condition, and more hours for larger units or units needing carpet extraction or odor treatment. Book cleaners and trades the moment you receive move-out notice. Waiting until the unit is empty to start calling vendors is the single biggest avoidable delay in the whole process.
What Should Be in Your Cleaning Vendor Contract?
A vague verbal agreement with a cleaner is how landlords end up disputing invoices after the fact. Put the scope in writing, priced by unit type, with explicit add-ons listed separately: carpet extraction, heavy-soil surcharges, appliance deep-clean, and odor treatment shouldn’t be buried in a flat rate you didn’t agree to.
Insurance matters more than most landlords realize until something goes wrong. Require a current certificate of liability insurance before the first job, and bonding whenever the crew holds a key. Reputable turnover vendors provide post-clean photo documentation and a completion checklist as standard practice, and they carry insurance you can verify before handing over access, according to Realtor Cleaning Guide.
Your contract should also spell out:
- A re-clean policy: what happens, and how fast, if you find missed items during walkthrough
- Acceptance criteria: post-clean photos plus a signed checklist, not just a phone call saying “it’s done”
- Minimum booking notice, typically 48 to 72 hours
- Key handling procedures and a single point of contact for scheduling
Pro Tip: Write a line into the contract requiring the cleaner to confirm final sign-off from painters and other trades before starting. This keeps your crew from cleaning around wet paint or drywall dust and having to redo the job on your dime.
Functional Safety Checks Before the Next Tenant Moves In
Cleaning makes a unit look ready. It doesn’t make it safe. Before you list the property, someone, whether that’s you, a maintenance tech, or the cleaning crew’s final walkthrough, needs to confirm the systems actually work.
- Test smoke and carbon monoxide detectors, replace batteries, and log the test date
- Test every GFCI outlet, light switch, and ceiling fan; check the doorbell
- Run all faucets and flush every toilet, checking for rocking, slow drains, or leaks
- Confirm hot water reaches the kitchen and bathrooms within a reasonable time
- Change the HVAC filter, cycle the thermostat through heat and cool, and note the filter size for your records
None of this takes long, but skipping it means the first maintenance call from your new tenant arrives within days instead of months.
Building a Paper Trail That Survives a Deposit Dispute
Photograph every room the moment you get the keys, before cleaning or repairs touch anything. That’s your baseline. Once the turnover clean is complete, get post-clean photos and a signed completion checklist from the vendor to close the loop, a practice Realtor Cleaning Guide recommends specifically for defensibility in disputes.
Keep dated inspection forms, any owner-approved repair estimates, and itemized receipts for deductions in one place, a property folder or your property management software works fine. Record appliance serial numbers, HVAC filter sizes, and anything you replaced during the turn.
Timestamped, dated photos taken immediately at move-out are the strongest piece of evidence landlords have when a tenant disputes a deposit deduction. Without them, it’s your word against theirs.
- Move-out photos, dated
- Post-clean photos and vendor checklist
- Signed repair approvals and receipts
- Appliance serials and filter sizes on file
What to Do With Items a Tenant Leaves Behind
Every turnover eventually includes a tenant who leaves something behind, a lamp, a box of clothes, sometimes furniture too heavy to move on short notice. How you handle it depends on state and local landlord-tenant law, which varies on notice periods, storage duration, and what counts as abandoned property, so check your jurisdiction’s specific statute before disposing of anything.
Most laws require landlords to send written notice to the tenant’s last known address, describing the items and giving a set window, often somewhere between 7 and 30 days depending on the state, to reclaim them. Photograph everything left behind before you touch it. This protects you if the tenant later claims something valuable went missing, and it gives your cleaning crew a clear record of what was present before the unit was cleared.
Do not treat obviously personal items (photos, documents, medication, identification) the same way you’d treat a broken lamp. Some states require extra handling for these categories regardless of value. If the items have resale value, many jurisdictions require you to store them for the notice period before donating, discarding, or selling them to cover storage costs.
Build this into your turnover timeline. Item removal has to happen before repairs and cleaning start, so don’t schedule your cleaning crew until the unit is legally clear. A cleaner should never be the one deciding what stays or goes.
Pest Control Between Tenants: What to Check and When
Pest issues rarely announce themselves at move-out. A tenant’s clutter can hide early signs of a problem that becomes obvious only once the unit is empty. Walk the unit specifically looking for pest evidence as part of your inspection, not as an afterthought once cleaning is underway.
Check under sinks, behind and under the refrigerator and stove, along baseboards, and in closets for droppings, shed skin, or nesting material. Kitchens and bathrooms are the highest-risk zones because of moisture and food residue. If the previous tenant reported pest issues during their lease, treat that as a signal to schedule a professional pest inspection before cleaning, not after.
Sequencing matters here too. If pest treatment is needed, it generally should happen before the deep clean, since many treatments involve baiting or spraying that a fresh clean would remove or contaminate. Talk to your pest control vendor about compatible timing with your cleaning crew so one doesn’t undo the other’s work.
Between tenants is also the ideal window for preventive measures regardless of whether you found active signs: sealing gaps around pipes, checking window screens, and confirming door sweeps are intact. These are cheap fixes now that prevent a much more expensive infestation problem six months into a new lease. Document any pest treatment with dated service records, the same way you document repairs and cleaning, in case a future tenant raises a complaint.

Getting a Fair Deal on Your Cleaning Service Contract
Landlords who use the same vendor for years often stop negotiating and just accept whatever the invoice says. That’s a mistake, especially as your portfolio grows and your leverage with a vendor increases.
Ask for volume pricing if you manage multiple units or turn over properties regularly. A vendor doing six turnovers a year for you should offer better per-unit pricing than a one-time customer, and if they won’t, that’s worth knowing before you sign anything long-term. Get add-on pricing in writing upfront: carpet extraction, odor treatment, and heavy-soil surcharges should be listed as specific dollar amounts, not left to be negotiated after the crew has already seen the mess.
Review the re-clean policy line by line before you sign. A contract that says “customer satisfaction guaranteed” without defining a response window or acceptance criteria is not a real guarantee. Ask specifically: how many days do you have to report an issue, and how fast will they return to fix it?
Renew the conversation annually, even with a vendor you’re happy with. Ask for an updated certificate of insurance every year regardless of how long you’ve worked together, and revisit pricing if your unit mix or turnover volume has changed. A contract you signed three years ago at three properties doesn’t necessarily reflect fair pricing at fifteen.
What Turnover Cleaning Actually Looks Like on the Ground
The single most expensive mistake I see landlords make isn’t a bad cleaner, it’s bad sequencing. Cleaning before repairs wraps up means paint dust settles on surfaces the crew already wiped down, and that’s a re-clean you’re paying for twice.
The other pattern worth flagging: behind the toilet and inside pillowcases (yes, some units still have bedding left behind) are where hair and debris hide longest, and where a rushed crew cuts corners. Inspection-first sequencing is the habit that separates a smooth turnover from a delayed one. A vendor relationship you trust, one that shows up on schedule and documents its own work, cuts re-cleans and vacancy days more than any checklist alone.
— Steven
Let Octomaids Handle Your Next Turnover
A reliable local cleaning company can offer stability between every lease. Every turnover job should come with a clear scope of work, insurance verification, and a defined re-clean policy, so you’re not guessing whether the unit is actually ready when a new tenant walks in.
Book with Octomaids and you’ll get post-clean photos and a completion checklist on request, the exact documentation this guide recommends keeping on file for every turn. Our teams serve landlords and property managers throughout Vancouver, WA and the Portland, OR metro, and we work around your repair and paint schedule rather than forcing you to work around ours. If you manage more than one property, ask about volume pricing when you request a quote for move-in/move-out cleaning. For units needing extra attention beyond a standard turn, our team also handles deep cleaning services built for exactly this kind of reset. Check availability now and get your next unit rent-ready without the back-and-forth.
Sources
- Rental Turnover Cleaning for Property Managers 2026: Cost & Vendor Guide | Realtor Cleaning Guide
- Tenant turnover checklist (Buildium)
- Apartment Make-Ready Checklist + Free Toolkit (2026) | Lula
- Apartment Turnover Cleaning: A Property Manager’s Checklist | Levdok Services
FAQ
What order should landlords follow for turnover cleaning?
Inspect and photograph the unit first, complete repairs and paint, fix flooring issues, then schedule the professional cleaning last, followed by a QA walkthrough.
How long does a rental turnover cleaning take?
Expect several crew hours for a small one-bedroom in average condition, and more hours for larger units or units needing carpet extraction or odor treatment.
Should I clean the unit before or after repairs?
Always after. Cleaning before repairs and paint almost always forces a second clean once dust and debris from trade work settle on surfaces.
What insurance should a turnover cleaning vendor carry?
Require a current certificate of liability insurance before the first job, and bonding whenever the crew is entrusted with keys to the unit.
What should I do if a tenant leaves personal items behind?
Photograph the items, then follow your state’s abandoned property notice requirements before donating, discarding, or storing them, since timelines and rules vary by jurisdiction.
Recommended
- Move Out Cleaning Checklist for Renters: Get Your Deposit Back
- Short Term Rental Cleaning Checklist: Host’s Guide
- Areas to Clean Before Moving Out: Deposit Checklist
- Why Rental Properties Need Deep Cleans: 2026 Guide
About Octomaids
Octomaids is a locally operated professional cleaning company serving Vancouver, Clark County, and the surrounding Portland metro area. Since 2006, our cleaning teams have helped homeowners, renters, property managers, and businesses with recurring cleaning, deep cleaning, move-in/move-out cleaning, and commercial cleaning.
Our cleaning articles are reviewed to ensure the information reflects our real-world experience and professional cleaning practices.