


For vinyl floors, start by clearing away dry grit with a dust mop or suction-only vacuum, then damp-mop with a pH-neutral cleaner made for luxury vinyl tile (LVT) or luxury vinyl plank (LVP). Skip solvents, waxes, and standing water every time. If you see haze that never clears, lifting seams, or heavy embedded soil, that job belongs to a professional crew, not a mop bucket.
- Remove dry soil first, always, before any liquid touches the floor
- Damp-mop with an LVT-safe neutral cleaner and a well-wrung microfiber head
- Never use wax, solvent strippers, or excess water
- Call a pro for persistent haze, seam lifting, or large-scale grime
Key Takeaways
Vinyl surfaces last longest when dry soil comes off first, cleaners stay neutral pH, and haze that won’t clear when wet signals it’s time for a professional instead of another round of scrubbing.
| Point | Details |
|---|---|
| Dry mop before wet mopping | Grit under a wet mop acts like sandpaper on the wear layer, causing lasting micro-scratches. |
| Stick to neutral pH cleaners | Products in the roughly pH 6.5 to 9 range clean effectively without breaking down the finish. |
| Skip wax, solvents, and puddles | These cause cloudy buildup, discoloration, or softened vinyl that cleaning can’t reverse. |
| Diagnose with a wet test | Haze that clears when wet can often be restored; haze that stays means the wear layer is damaged. |
| Call a pro for persistent problems | Octomaids brings LVT-safe equipment, correct pads, and manufacturer-compliant chemistry for deep cleans and restoration prep. |
Table of Contents
- How Do You Clean Vinyl Floors the Right Way?
- When Should You Hire a Professional Instead of Cleaning It Yourself?
- Step-by-Step: Daily, Periodic, and Deep Cleaning for Vinyl Floors
- How Do You Clean Vinyl Upholstery Without Damaging the Coating?
- What’s the Safe Way to Clean Vinyl Siding and Trim?
- Restore, Repair, or Replace: How to Tell the Difference
- What Should a Vinyl Maintenance Schedule Look Like?
- What’s the Right Way to Deep Clean Delicate Home Surfaces?
- Which Home Cleaning Method Actually Works, and Which One Risks Damage?
- Professional Vinyl Care from Octomaids
- Sources
- FAQ
How Do You Clean Vinyl Floors the Right Way?
Getting vinyl floors clean without wrecking the finish comes down to having the right kit on hand and knowing what to keep far away from the surface.
- Microfiber dust mop or suction-only vacuum — pulls grit off the surface without grinding it in
- Microfiber mop head — holds cleaner without oversaturating the floor
- Neutral pH cleaner rated for LVT or resilient vinyl
- White or soft pad for any machine scrubbing
- Two clean buckets — one for cleaner, one for rinse water
Never reach for beater-bar vacuums, string mops, solvent degreasers, or the high-pH strippers made for VCT (vinyl composition tile). Wax and polish products belong nowhere near LVT. For a fresh spill, blot immediately and wipe with a damp microfiber cloth. For scuffs, a small dab of isopropyl alcohol on a soft cloth usually lifts the mark. Rinse the spot afterward so no residue sits on the surface.
Pro Tip: Keep a dedicated “floor only” microfiber cloth in a utility closet near high-traffic entries. Grabbing the nearest rag off a shelf is how kitchen grease and abrasive grit end up back on your vinyl.
When Should You Hire a Professional Instead of Cleaning It Yourself?
Some jobs are a ten-minute fix. Others are a sign the floor has moved past what a mop and bucket can solve.
- Haze that stays even after the floor dries completely
- Seams that have started lifting or separating
- Adhesive, wax, or old finish residue left behind by a previous cleaning contractor
- Embedded grit that needs a machine scrub, not a hand mop
- Any commercial space large enough to require an auto-scrubber
Professional crews bring LVT-safe scrubbing machines, the correct pad grade, manufacturer-compliant cleaning chemistry, and equipment to extract rinse water so nothing sits and re-soils the floor. If you’re gathering quotes, take photos of the affected area, note the flooring material and room, and describe when the damage first appeared. That level of detail gets you a far more accurate estimate than “the floor looks dull.”
Step-by-Step: Daily, Periodic, and Deep Cleaning for Vinyl Floors
Grit is the real enemy of a vinyl wear layer. Left on the surface and then mopped over, it acts like fine sandpaper dragged across the finish every time someone walks by, which is why the sequence below always starts dry.
- Dry soil removal. Dust mop or run a suction-only vacuum over the entire floor before introducing any liquid. Interface’s LVT maintenance guidance treats this step as non-negotiable, not optional prep.
- Damp-mop. Dilute a neutral cleaner (roughly pH 6.5 to 9) per the label, wring the microfiber head until it’s barely damp, and mop with the grain of foot traffic. Skip standing water and puddles entirely.
- Periodic deep clean. For heavier traffic zones, a low-RPM scrubber or auto-scrubber fitted with a white or soft pad handles what a hand mop can’t reach. Bruce’s commercial maintenance guidance specifies pad grades roughly equivalent to 3M red or blue, run at low pressure, followed by a thorough rinse and extraction pass so nothing dries back onto the floor.
- Spot treatment. Greasy stains often respond to a citrus-based cleaner; scuffs usually lift with isopropyl alcohol on a soft cloth. Rinse the spot afterward no matter which product you used.
A restorer or refresher product can fill in fine micro-scratches on an LVT floor that’s otherwise sound, but it only works after a full deep clean, never as a shortcut around one. Skipping that dry-mop pass is the single most common mistake crews make, and it’s the one that turns a five-year floor into a two-year replacement.
How Do You Clean Vinyl Upholstery Without Damaging the Coating?
Vinyl chairs, booths, and headboards handle regular care well, but the coating that gives vinyl its wipeable surface has limits.
- Vacuum with a soft brush attachment to lift loose dust and debris
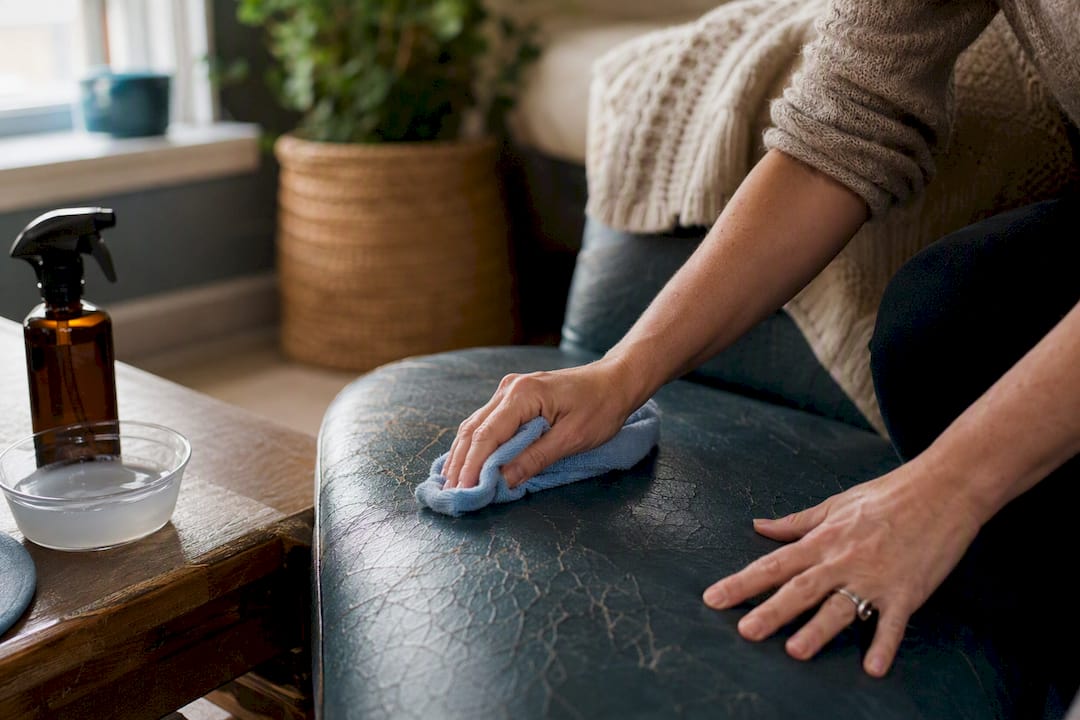
- Wipe with a lather of mild dish soap and water, or a cleaner made for vinyl upholstery
- Avoid soaking the material or letting cleaner sit for extended dwell time
- Rinse with a clean, damp cloth to remove all soap residue
Always test any cleaner on a hidden section first. Some upholstery finishes react differently than others, and a patch test on the underside of a cushion saves you from a visible mistake on the seat itself. Vinyl upholstery care guidance also flags a hard limit worth knowing: tackiness, flaking, or visible cracks in the coating mean the material has failed, and no amount of cleaning brings that back. At that point you’re looking at reupholstering, not scrubbing harder.
Pro Tip: If a stain has already set into cracked vinyl, stop cleaning it. Continued scrubbing on failed coating usually spreads the crack instead of removing the stain.
What’s the Safe Way to Clean Vinyl Siding and Trim?
Exterior vinyl takes a beating from pollen, algae, and road grime, but it’s forgiving if you work with the right sequence.
- Brush off loose dirt or rinse at low pressure before applying any cleaner
- Skip abrasive scrubbing, which can scuff or dull the surface finish
- Use a mild detergent or a cleaner made specifically for siding, applied with a soft brush
- Rinse thoroughly from top to bottom so no soap film dries on the surface
Keep pressure washers at a distance and a moderate setting. Held too close, they force water behind seams and panels. Solvent-based cleaners carry the same risk on siding that they carry on vinyl flooring: they can soften or discolor the material permanently.
Restore, Repair, or Replace: How to Tell the Difference
A wet inspection under raking light (light angled low across the surface) tells you more in thirty seconds than any amount of guessing. If the haze disappears once the floor is wet and comes back only as it dries, Opora’s LVT diagnostic guidance treats that as a restorable surface. If the haze never clears even when wet, that’s chemical or abrasive damage to the wear layer itself, and cleaning won’t touch it.
- Restorable: deep clean, apply an LVT-compatible restorer, then reassess
- Check compatibility first: confirm the restorer product matches the flooring manufacturer’s specification before applying it
- Replace instead of restore: persistent haze, delamination, lifted seams, or wear-layer loss across a wide area
Restorer products fill fine surface scratches and refresh sheen, but they’re a mid-life maintenance tool, not a permanent fix like a factory finish.
What Should a Vinyl Maintenance Schedule Look Like?
A schedule only works if someone actually follows it, so keep this one simple enough to hand to a tenant or a part-time custodian.
- Daily: dust mop or vacuum high-traffic paths; wipe up spills the moment they happen
- Weekly to monthly: damp-mop with a neutral cleaner and walk the space checking for new stains, scuffs, or wear
- Quarterly to annual: run a periodic machine scrub, or bring in a professional deep clean crew for heavier commercial traffic
- Annual (high-traffic settings): apply a restorer or refresher after that deep clean to keep the wear layer protected
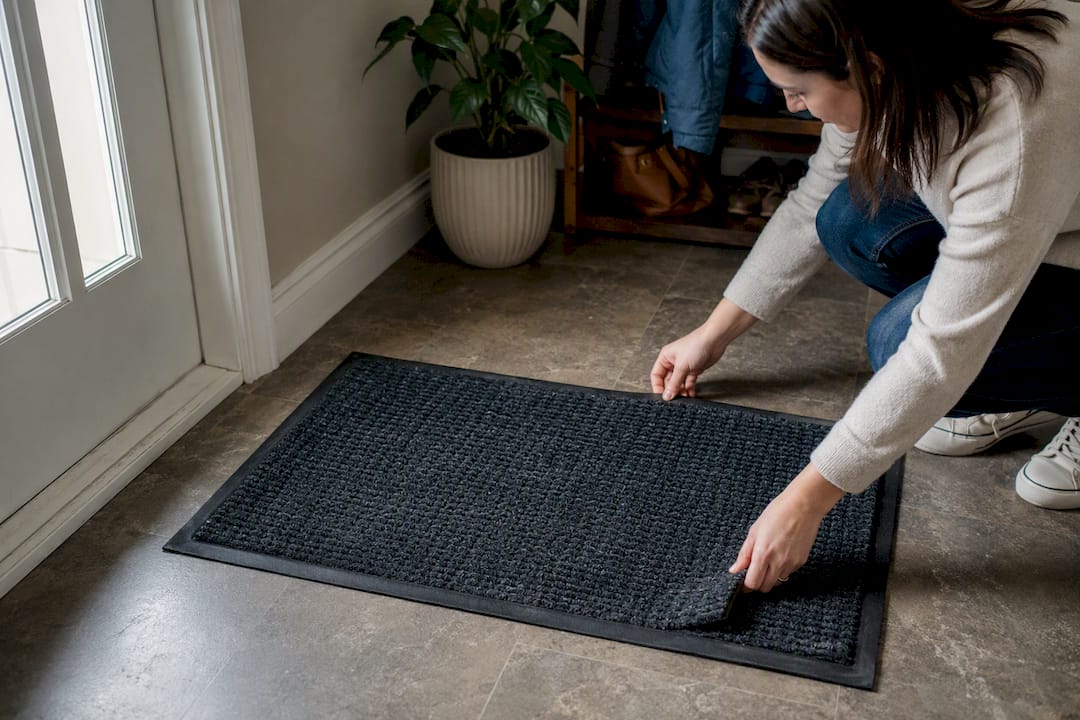
Walk-off mats at every entrance do more heavy lifting than most property managers give them credit for. IVC’s commercial maintenance guidance lists vacuuming and preventive matting among the five keys to keeping vinyl floors clean longer between deep cleans. Skip rubber-backed mats, though. Rubber can react with vinyl and leave a permanent discolored patch exactly where the mat sat.
Pro Tip: Rotate walk-off mats every few months. A mat that never moves eventually leaves its own outline burned into the floor.
What’s the Right Way to Deep Clean Delicate Home Surfaces?
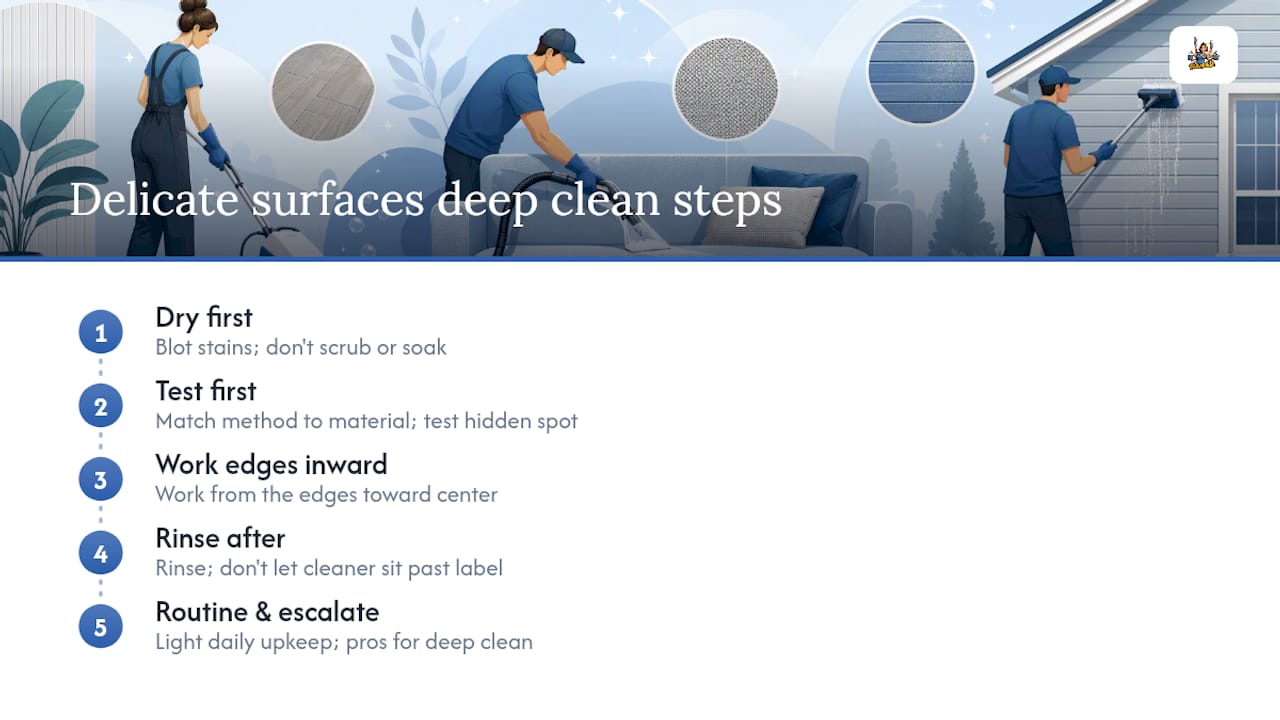
Vinyl isn’t the only surface where the wrong cleaning method causes lasting damage instead of fixing the problem. Fabric upholstery, area rugs, and grout all have their own version of “don’t soak it, don’t scrub it, don’t use the wrong chemical,” and getting that sequence wrong is exactly how a small stain turns into a permanent one. The same dry-first, test-first, rinse-after logic that protects a vinyl floor applies just as directly to a wine stain on carpet: blot before you scrub, work in from the edges, and never let cleaner sit longer than the label allows.
That principle, matching the method to the material rather than reaching for whatever’s under the sink, is really the backbone of good home maintenance generally. A homeowner’s routine between professional visits works best when it sticks to light daily upkeep and leaves the deeper, more technical work for scheduled service. Trying to compress a deep clean into a Tuesday-night wipe-down usually means skipped steps, and skipped steps are how wear layers get damaged and stains get set into fabric permanently.
For rental units and short-term rental turnovers specifically, high-traffic zones deserve special attention between guest stays, since those are the areas absorbing the most grit, spills, and foot traffic in the shortest amount of time. A floor that only gets a quick pass between renters accumulates exactly the kind of embedded soil that eventually needs a machine scrub instead of a damp mop.
Which Home Cleaning Method Actually Works, and Which One Risks Damage?
Homeowners tend to reach for whatever’s already in the cabinet, and that’s exactly where most vinyl damage starts.
| Method | Effectiveness | Risk |
|---|---|---|
| Dry dust mop / suction vacuum | High for routine soil removal | Low, essentially the safest step available |
| Neutral pH damp mop | High for general cleaning | Low, if the mop is well-wrung and not left standing |
| Vinegar or acidic cleaners | Moderate on grease | Can dull finish and strip protective coating over time |
| Wax or polish products | Cosmetic shine only | High, coats the wear layer and causes cloudy buildup |
| Solvent-based degreasers | Strong on grease | High, can soften or discolor the vinyl surface |
| Steam mops | Poor to moderate | High, heat and moisture can force water into seams |
| Machine scrub with white/soft pad | High for embedded soil | Low, when RPM and pressure stay within manufacturer limits |
The pattern here isn’t complicated: anything gentle and dry-first performs well, and anything acidic, waxy, or heat-based tends to trade a short-term shine for long-term damage. When a floor or a piece of upholstery has clearly moved past what these home methods can fix, that’s the point to compare a deep clean against your regular routine and decide whether it’s time to call in a crew that works with commercial-grade equipment instead.
Professional Vinyl Care from Octomaids
Octomaids is the alternative to guessing your way through a floor or upholstery problem with whatever’s under the sink. If you’re a property manager juggling turnover schedules, or a homeowner staring at a haze that won’t budge, our teams bring manufacturer-compliant cleaning chemistry, the correct pad grades, and rinse-extraction equipment that a mop and bucket simply can’t match.
A professional visit from Octomaids includes an assessment of your flooring or upholstery material, the right neutral-pH products for that surface, documented before-and-after results, and a recommended follow-up frequency based on your traffic levels. Whether you need a one-time deep clean ahead of a big event, move-in or move-out turnover service, or scheduled recurring maintenance for a commercial space in the Vancouver, WA or Portland, OR metro area, our background-checked teams handle it with the same crew every visit. Ready to get a floor or upholstery problem handled correctly the first time? Book a deep cleaning service with Octomaids and skip the trial-and-error entirely.
A Field Note on What Actually Goes Wrong
The two mistakes I see most often are the same two, over and over: skipping the dry-mop step and grabbing whatever pad happens to be on the machine. Dust-mop before you ever introduce water. Grit under a wet mop is what turns a clean floor into a scratched one.
Sources
- IVC commercial vinyl maintenance guide
- Vinyl upholstery care and cleaning instructions (Wolf/Gordon)
FAQ
Can You Steam Clean Vinyl Floors?
Steam mops introduce more heat and moisture than most LVT manufacturers recommend, and that combination can force water into seams. Stick with a damp microfiber mop and a neutral cleaner instead.
How Often Should Commercial Vinyl Floors Get a Deep Clean?
Most commercial spaces do well with a quarterly machine scrub, though high-traffic entries or lobbies may need it more often. Octomaids can assess your specific traffic pattern and set a realistic schedule.
Is Rubbing Alcohol Safe on Vinyl Upholstery?
Isopropyl alcohol works well on floor scuffs, but test it on an inconspicuous section of upholstery first since some vinyl finishes react differently. Always rinse the spot afterward to remove residue.
When Is It Safe to Use a Restorer Product on LVT?
Only after a complete deep clean and only if the product is confirmed compatible with your specific flooring, since restorers fill micro-scratches rather than fix underlying wear-layer damage.
What Are the Clearest Signs of Wear-Layer Failure?
Haze that never clears even when the floor is wet, along with delamination or lifted seams, all point to wear-layer loss that cleaning can’t reverse and that usually means replacement.
Recommended
- How to Clean Baseboards Efficiently: Fast Home Routine
- High-Traffic Rental Areas to Deep Clean: A Room-by-Room Guide
- Deep Clean House Checklist for Every Room
About Octomaids
Octomaids is a locally operated professional cleaning company serving Vancouver, Clark County, and the surrounding Portland metro area. Since 2006, our cleaning teams have helped homeowners, renters, property managers, and businesses with recurring cleaning, deep cleaning, move-in/move-out cleaning, and commercial cleaning.
Our cleaning articles are reviewed to ensure the information reflects our real-world experience and professional cleaning practices.