



A clean oven move-out checklist is the single most effective tool for passing landlord inspections and recovering your full security deposit. Ovens are the most frequently failed appliance in move-out inspections, with landlords citing baked-on grease, dirty racks, and residue on door glass as the top reasons for cleaning fee deductions. A systematic, zone-by-zone approach separates renters who get their deposit back from those who don’t. This guide walks you through every step, from gathering supplies to documenting your work, so nothing gets missed.
What tools and supplies do you need for oven cleaning?
The right supplies make the difference between a surface wipe and a genuinely clean oven. Gather everything before you start so you are not hunting for a sponge mid-clean.
Cleaning agents
- Baking soda paste: Mix baking soda with just enough water to form a thick paste. This is the safest, most effective agent for breaking down heavy grime without damaging oven surfaces.
- White vinegar: Spray undiluted white vinegar over baking soda paste to create a fizzing reaction that lifts residue. It also neutralizes odors.
- Dish soap: Add a few drops to hot water for soaking racks and wiping down exterior surfaces.
- Commercial oven cleaner (optional): Use only if your oven is not self-cleaning and the buildup is severe. Always follow the manufacturer’s directions and ventilate the room.
Tools and equipment
- Rubber gloves (heavy-duty)
- Microfiber cloths and non-scratch sponges
- A plastic scraper or old credit card for lifting hardened deposits
- Large heavy-duty plastic bags for soaking racks
- Cotton swabs for knob edges and tight corners
- A spray bottle for vinegar
- Old towels to protect the floor under the oven door
Choosing the right cleaner for your oven type matters. Self-cleaning ovens have special enamel coatings that harsh commercial chemicals can damage. For those ovens, baking soda and vinegar are the safest path. Gas ovens have burner grates that need separate attention, while electric ovens often have a hidden broiler drawer that renters routinely overlook.
| Oven type | Recommended cleaner | Tools to prioritize |
|---|---|---|
| Self-cleaning (electric) | Baking soda paste, white vinegar | Microfiber cloth, cotton swabs |
| Standard electric | Baking soda paste or commercial cleaner | Plastic scraper, non-scratch sponge |
| Gas range | Dish soap, baking soda paste | Sponge, separate grate soak |
| Broiler-only drawer | Dish soap, degreaser | Sponge, old toothbrush |
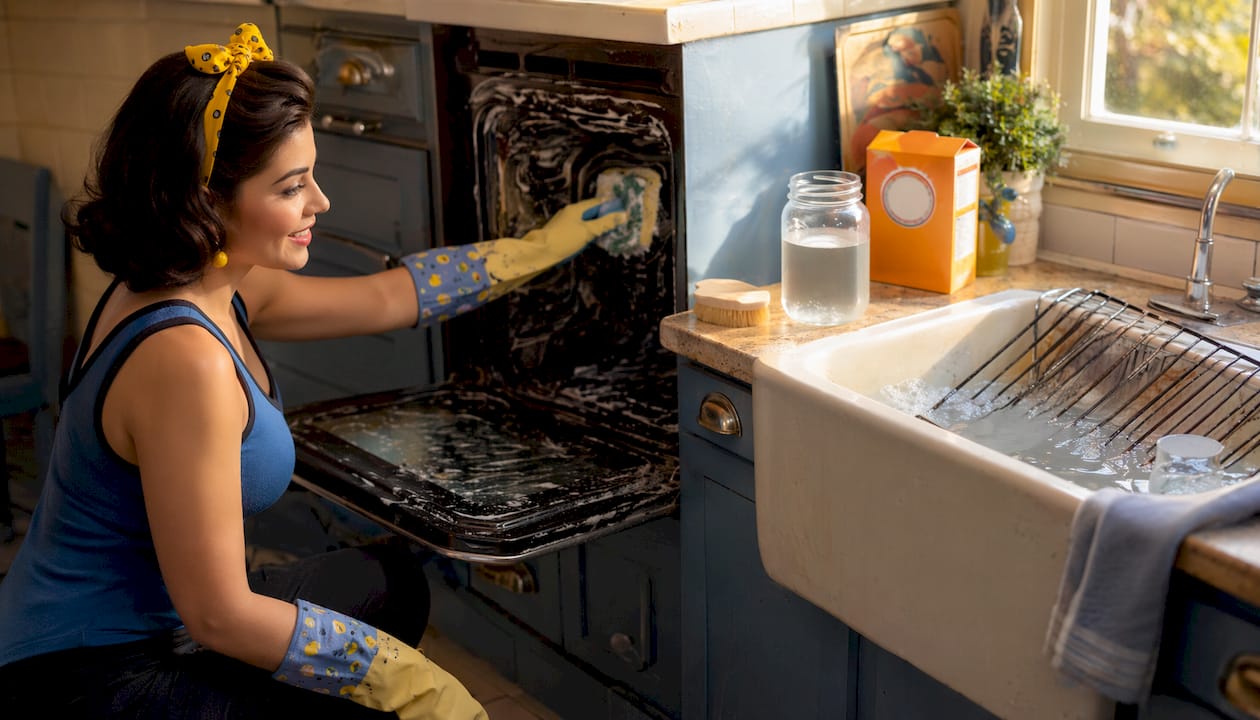
Pro Tip: Buy an extra box of baking soda. You will use more than you expect on a heavily soiled oven, and running out mid-clean means dried paste that is harder to remove.
What is the step-by-step oven cleaning process for move-out?
Move-out oven cleaning is more thorough than routine maintenance because you need to access overlooked zones like broiler drawers and door seals that rarely get attention during regular upkeep. Breaking the job into two sessions keeps it manageable and produces better results.
Session one: pre-soak and heavy grime removal
-
Remove the racks. Pull out all oven racks and the broiler drawer insert. Place them in large heavy-duty plastic bags with hot water and a generous squirt of dish soap. Seal the bags and let them soak. Soaking racks for at least 1 hour, or overnight, loosens stuck-on grime far more effectively than scrubbing dry.
-
Apply baking soda paste inside the oven. Coat the oven floor, walls, and ceiling with a thick layer of baking soda paste. Avoid the heating elements on electric ovens. Baking soda paste needs at least 1 hour to work on moderate buildup, and overnight for heavy carbon deposits. Set a timer and walk away.
-
Steam the interior (optional but effective). Place an oven-safe bowl filled with water and a splash of white vinegar inside. Heat the oven to 250°F for 20 minutes. The steam softens grease before you apply the paste, cutting your scrubbing time significantly.
-
Scrub the racks. After soaking, remove the racks from the bags and scrub with a non-scratch sponge. Rinse thoroughly and set aside to dry on old towels.
Session two: deep cleaning and final wipe-down
-
Wipe out the paste. Use a damp microfiber cloth to wipe away the baking soda paste and loosened grime. Work from the top of the oven interior down to the floor so debris falls to the bottom. Spray white vinegar over any remaining paste residue to neutralize it and wipe clean.
-
Clean the oven door glass. Apply fresh baking soda paste to the interior glass and let it sit for 20 minutes. Wipe clean with a damp cloth. For the gap between the glass panes, door seals and internal glass are among the top causes of deposit deductions, so do not skip this step. Some oven models allow you to unscrew the door panel for access.
-
Wipe the door seal. Use a damp cloth to clean the rubber gasket around the oven door. Do not soak it. Cleaning door seal creases requires gentle damp wiping rather than soaking, which can push grime deeper into the gasket. Use a cotton swab for tight spots.
-
Clean knobs and the control panel. Remove knobs if they pull off easily and wash them in soapy water. Wipe the control panel with a barely damp cloth. Use cotton swabs around the base of each knob.
-
Reassemble and inspect. Replace the dry racks and broiler drawer. Open the oven door and inspect every surface under good lighting. Look for streaks on the glass, residue on the oven floor, and any missed spots on the walls.
Pro Tip: Schedule your first cleaning session at least three days before your move-out date. Packing exhaustion is real, and a rushed oven clean is the one most likely to fail inspection.
What oven cleaning mistakes can cost you your deposit?
Renters lose deposit money not because they skipped cleaning entirely, but because they missed specific zones or made avoidable errors. Recognizing these pitfalls before you start saves you money and stress.
- Not soaking the racks long enough. Scrubbing dry racks without soaking first leaves a film of grease that inspectors notice immediately. Give them at least an hour in hot soapy water.
- Skipping the door seal and between-pane glass. These two areas are top causes of deposit deductions and are easy to overlook because they require extra effort to reach.
- Using harsh chemicals on self-cleaning ovens. Commercial oven sprays can strip the enamel coating on self-cleaning models, creating damage you will be charged for. Stick to baking soda and vinegar on these ovens.
- Not following product directions. Leaving a commercial cleaner on too long, or not ventilating the room, can cause surface damage and health hazards. Read the label before you open the bottle.
- Cleaning too late in the move-out window. Experts recommend starting oven cleaning early in your move-out schedule. Cleaning a dirty oven the night before handover, while surrounded by boxes, almost always produces a substandard result.
- Skipping documentation. Cleaning without photographing your work leaves you with no evidence if a dispute arises. Photos cost nothing and protect everything.
Pro Tip: Do a final inspection with a flashlight. Oven interiors have corners and ceiling edges that look clean under normal light but reveal residue under a direct beam.
How do you document oven cleaning to protect your deposit?
Documentation turns your cleaning effort into evidence. Without it, a landlord’s word against yours is difficult to win. A zone-by-zone approach to photography and record-keeping gives you a clear paper trail.
-
Photograph before you start. Take high-resolution photos of the oven interior, racks, door glass, broiler drawer, and control panel before cleaning. These establish the baseline condition you inherited.
-
Photograph after each session. Capture the same zones after cleaning. Detailed photos of all oven surfaces provide objective proof in deposit disputes and remove ambiguity about what you cleaned.
-
Keep your receipts. Save receipts for every cleaning product you buy. Receipts for cleaning products and professional service reports serve as objective deposit proof if a landlord challenges your claim.
-
Verify the landlord’s standard in writing. Landlord cleaning standards vary widely. Always verify expectations in writing before your move-out date so you know exactly what “clean” means to your specific landlord. A quick email asking for their move-out cleaning standard creates a written record.
-
Request a time-stamped report if you hire professionals. A professional cleaning receipt with a date and a checklist of completed tasks is strong evidence in any deposit dispute.
“Photographing all oven surfaces with good lighting both before and after cleaning provides objective proof to landlords and reduces deposit disputes significantly. Pair those photos with receipts and a written confirmation of the landlord’s standard, and you have a complete record that is very difficult to dispute.”
For a broader view of what landlords inspect beyond the oven, the move-out deposit checklist from Octomaids covers every room systematically.
Key Takeaways
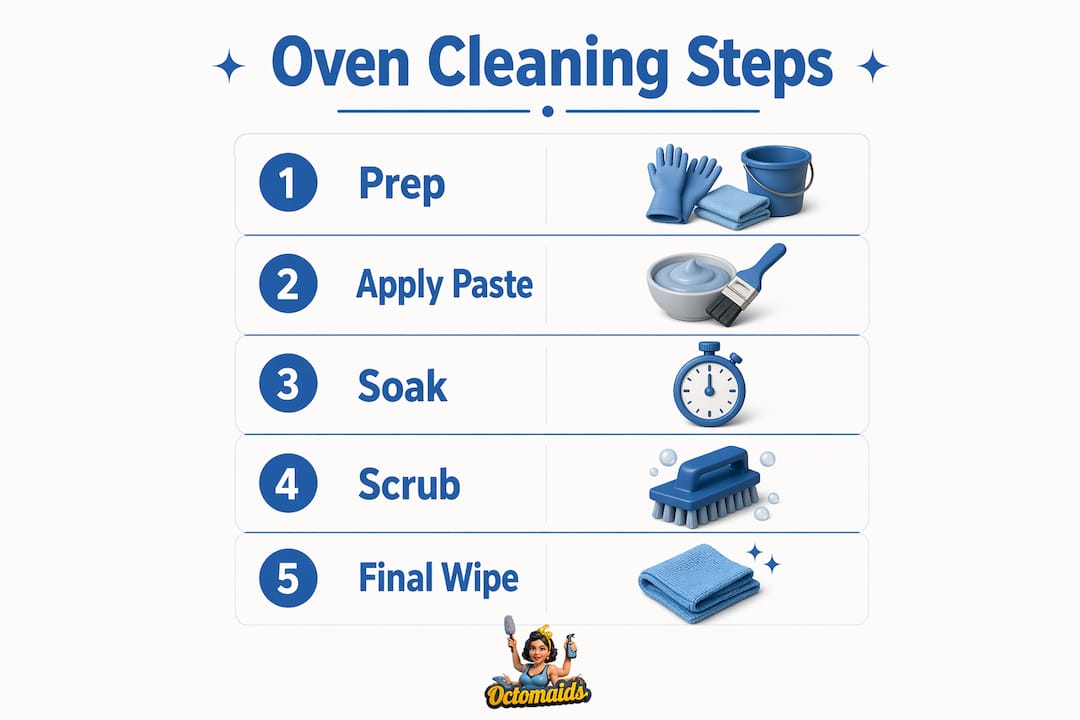
A thorough oven cleaning checklist, paired with photo documentation and written confirmation of landlord standards, is the most reliable way to protect your security deposit.
| Point | Details |
|---|---|
| Oven is the top inspection failure | Landlords most often deduct fees for baked-on grease, dirty racks, and residue on door glass. |
| Soak time is non-negotiable | Baking soda paste and racks both need 1 hour to overnight to loosen heavy buildup effectively. |
| Document every zone | Photograph before and after cleaning, and keep all product receipts as deposit dispute evidence. |
| Verify the landlord’s standard | Get the definition of “clean” in writing before your move-out date to avoid surprises. |
| Start early in your move-out window | Cleaning the oven while exhausted from packing produces poor results and risks inspection failure. |
What I have learned from years of move-out oven cleans
The oven is the appliance renters most consistently underestimate. I have seen people spend hours scrubbing counters and floors, then hand over a property with a grease-coated broiler drawer and wonder why they lost $200 from their deposit.
The insight that changes everything is this: move-out cleaning is not the same as regular cleaning. During a normal weekly clean, you wipe the obvious surfaces and move on. During a move-out clean, you are being evaluated against a standard, and the inspector is looking specifically at the zones you are most likely to skip. The door seal, the gap between the glass panes, the underside of the oven ceiling, and the broiler drawer are exactly those zones.
My strongest advice is to schedule oven cleaning early in your move-out window, ideally a week before your handover date. That gives you time to do a first session, let the paste work overnight, and come back the next day fresh. It also gives you a buffer if you discover the buildup is worse than expected.
The documentation habit is the one most renters skip because it feels bureaucratic. It is not. A folder of timestamped photos and receipts has resolved deposit disputes that would otherwise have cost renters hundreds of dollars. Treat it as part of the cleaning process, not an afterthought.
— Steven
Octomaids move-out cleaning services for Vancouver and Portland renters
Moving out is stressful enough without spending your final days scrubbing a heavily soiled oven. Octomaids has provided professional move-out cleaning services to renters across Vancouver, WA and Portland, OR since 2006, and oven cleaning is one of the most requested tasks in every move-out package.
Our family-owned team handles every oven zone covered in this guide, from soaking racks to cleaning door seals and broiler drawers, and provides a time-stamped service checklist you can use as deposit documentation. If you want the confidence of knowing your oven meets inspection standards without spending your moving week on your knees with a sponge, our one-time deep clean is built exactly for that situation. Contact Octomaids to schedule your move-out clean before your handover date.
FAQ
What areas of the oven do landlords inspect most closely?
Landlords focus on the oven floor, racks, door glass, broiler drawer, and door seals. These zones accumulate the most baked-on grease and are the most common reasons for cleaning fee deductions.
How long should baking soda paste sit in the oven?
Baking soda paste needs at least 1 hour for moderate buildup and overnight for heavy carbon deposits. Longer soak time means less scrubbing and a cleaner result.
Can I use a commercial oven cleaner on a self-cleaning oven?
No. Commercial oven sprays can damage the enamel coating on self-cleaning ovens. Use baking soda paste and white vinegar instead, which are safe and effective on all oven types.
How do I prove I cleaned the oven if my landlord disputes the deposit?
Take high-resolution photos of every oven surface before and after cleaning, keep receipts for all cleaning products, and request a time-stamped checklist if you hire a professional service.
When should I clean the oven during my move-out process?
Start at least three to seven days before your handover date. Cleaning the oven early prevents the packing-phase fatigue that leads to rushed, incomplete results and failed inspections.