Your security deposit is real money, and landlords have a legal right to keep it if you leave the property in poor condition. Knowing the exact areas to clean before moving out is the difference between getting that check back in full and paying hundreds in deductions. A deep clean before moving goes well beyond wiping counters and vacuuming the living room. It means addressing every surface, corner, and appliance your landlord will check during the final walkthrough. This guide gives you a room-by-room breakdown of must-clean spots, practical pro tips, and everything you need to leave the place spotless.
Table of Contents
- Key takeaways
- 1. Areas to clean before moving out: the kitchen
- 2. Bathroom deep cleaning checklist
- 3. Living areas and bedrooms
- 4. Entryways, hallways, and overlooked spaces
- 5. How to prioritize, compare your options, and manage your time
- What I have actually learned from move-out cleaning
- Let Octomaids handle the hard part
- FAQ
Key takeaways
| Point | Details |
|---|---|
| Kitchen and bathrooms first | These rooms take the most time and cause the most deposit disputes when neglected. |
| Clean top to bottom | Start with ceiling fans and fixtures, then work down to floors to avoid re-soiling surfaces. |
| Document everything | Take date-stamped photos after cleaning each room to protect against unfair damage claims. |
| DIY minor repairs early | Patching nail holes yourself costs around $5 versus $50 or more charged by a landlord. |
| Consider professional help | Professional move-out cleaning typically runs $150 to $300 and often pays for itself. |
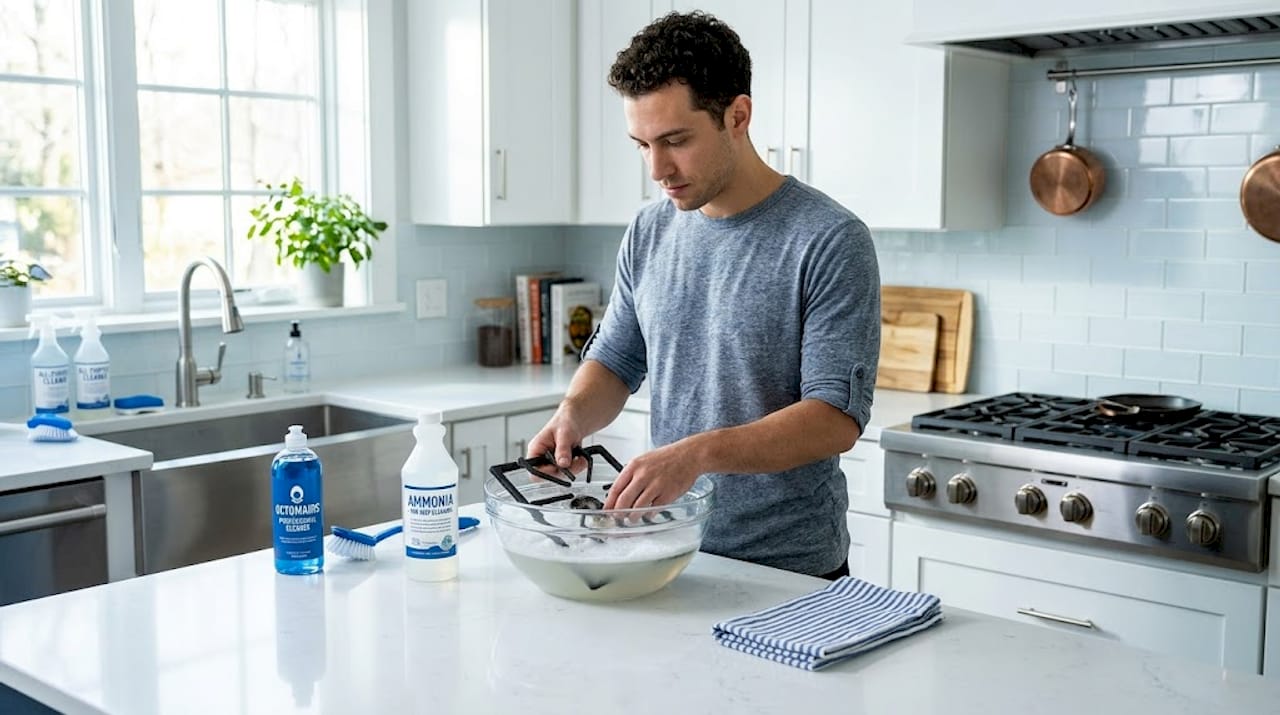
1. Areas to clean before moving out: the kitchen
The kitchen is the room that inspectors examine most closely. Grease builds up in places you stopped noticing months ago, and food residue inside appliances is one of the most common reasons landlords withhold deposits. Experts consistently recommend prioritizing the kitchen as your very first room precisely because it demands the most time and effort.
Work through these kitchen tasks in order:
- Oven and stovetop. Remove the burner grates and soak them in hot soapy water for at least 30 minutes. Apply oven cleaner inside the oven and let it sit while you work on other surfaces, then scrub clean. Wipe down the broiler drawer, which most tenants forget entirely.
- Refrigerator. Remove all shelves and drawers, wash them separately in the sink, and wipe the interior walls with a solution of baking soda and warm water to neutralize odors. Clean the rubber door seal where mold and crumbs collect, and pull the fridge forward to sweep and mop underneath.
- Microwave and dishwasher. Microwave the interior: place a bowl of water and lemon juice inside, run it for two minutes, then wipe down the softened residue. Clean the dishwasher filter at the bottom, wipe the door gasket, and run an empty cycle with a cup of white vinegar.
- Cabinets. Wipe the fronts with an all-purpose degreaser, then open each cabinet and wipe every shelf inside. Crumbs and sticky residue in the back corners are common inspection failures.
- Countertops, sink, and backsplash. Use a surface-appropriate cleaner for your countertop material. Scrub the sink with a non-abrasive cleaner and remove any limescale around the faucet. The backsplash behind the stove often carries splattered grease that needs a degreaser, not just a wipe.
- Floors. Sweep thoroughly, getting into corners and beneath the appliances you have moved. Mop with a suitable floor cleaner. If the floor has any sticky patches, a second mop pass is worth it.
Pro Tip: Soak oven burner grates overnight in a sealed bag with half a cup of ammonia. The fumes loosen baked-on grease far more effectively than scrubbing alone, and you barely have to touch a sponge.
2. Bathroom deep cleaning checklist
Bathrooms are the second largest source of deposit disputes. Soap scum, limescale, and mildew can look like permanent damage if left long enough, even when they are fully removable with the right products.
Here is what your bathroom cleaning checklist for moving should cover:
- Tub and shower. Spray the entire surface with a grout and tile cleaner, let it penetrate for five minutes, then scrub tiles and grout lines with a stiff brush. Soap scum on glass shower screens responds well to a paste of baking soda and dish soap. Rinse and check for mildew in the grout at the floor level where it is easy to miss.
- Toilet. Apply bowl cleaner under the rim and let it sit. Clean the outside of the tank, the base, and the area directly behind the bowl with disinfectant. Landlords inspect behind the toilet, and that spot is almost always overlooked by tenants in a hurry.
- Vanity and sink. Wipe cabinet fronts and the interior shelves. Scrub the sink basin and faucet. Remove limescale from around the tap handles and the drain cover.
- Mirrors. Use a glass cleaner and a microfiber cloth for a streak-free result. Microfiber cloths work significantly better than paper towels for glass surfaces.
- Floors and corners. Sweep first, then mop. Pay close attention to the corners and the space around the toilet base. These spots collect grime that becomes visible to an inspector in seconds.
- Shower curtain and mat. Launder these if they belong to the property, or replace them if they are damaged beyond cleaning. A moldy shower curtain is an immediate red flag during inspection.
Pro Tip: For stubborn limescale around taps and on shower screens, soak a cloth in white vinegar and wrap it around the fixture for 20 minutes. Wipe away without scrubbing, and the scale comes off cleanly.
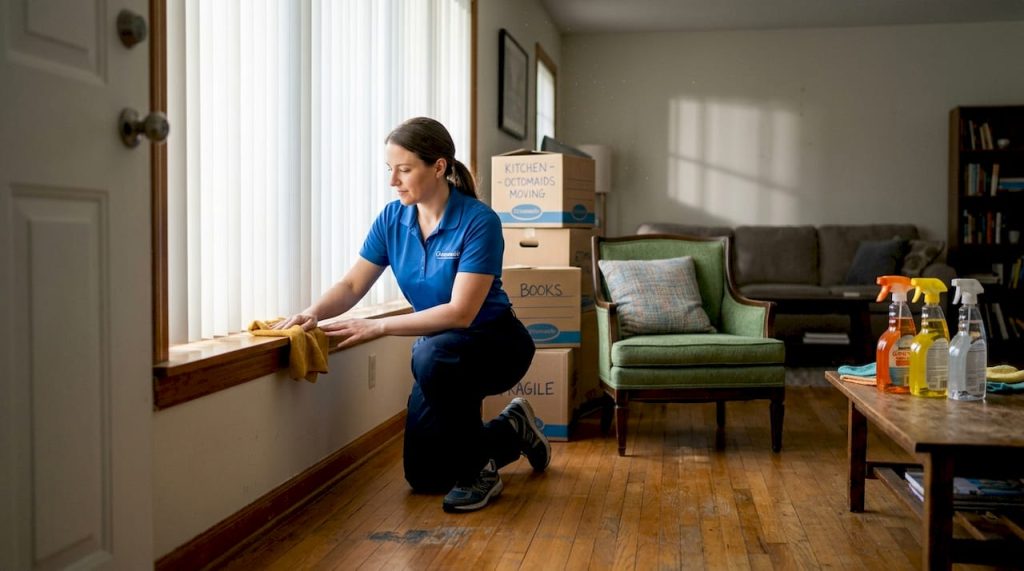
3. Living areas and bedrooms
Living rooms and bedrooms tend to accumulate the kind of damage you stop seeing after months of daily life: scuffs on baseboards, dusty blinds, and smudges on light switches. Clearing personal items first, so the space is empty, helps you see and access everything that needs attention.
- Dust all high surfaces first. Ceiling fan blades, light fixtures, and air vents collect months of dust. Cleaning top to bottom means this dust falls to the floor, where you capture it during vacuuming, rather than settling on surfaces you have already cleaned.
- Windows. Clean both sides of the glass where accessible. Wipe the sills and tracks, which often contain dirt, dead insects, and mold growth. Tracks are a detail most tenants miss.
- Carpets and hard floors. Thorough floor cleaning includes the space under where furniture was positioned. Carpet indentations from heavy furniture can often be raised by placing a damp cloth over them and using a clothes iron on low heat.
- Baseboards, walls, and doors. Wipe baseboards with a damp cloth. Spot-clean wall scuffs with a magic eraser before resorting to paint touch-ups. Clean door handles, light switches, and door frames, which accumulate oils and grime.
- Nail holes. Patching nail holes yourself costs as little as $5 in filler and paint. Leaving them means a landlord will charge $50 or more per hole for the same repair.
- Odors. Open windows to ventilate the space before the final walkthrough. If pets lived in the room, consider a carpet odor neutralizer applied and vacuumed the day before you leave.
Pro Tip: Take date-stamped photos of every room immediately after cleaning. These images are your strongest protection against a landlord claiming damage that was already present or that you caused after you left.
4. Entryways, hallways, and overlooked spaces
These areas rarely get dedicated attention because tenants simply pass through them rather than use them. That makes them easy to forget and just as easy for a landlord to flag during inspection.
- Floors. Vacuum or sweep hallway floors and entry mats. Mop hard surfaces and pay particular attention to the front entry, which collects tracked-in dirt and grime near the baseboards.
- Doors and frames. Wipe down the front door inside and out, clean the handles and keyhole area, and check the door frame for scuffs and handprints at shoulder height where people push doors open.
- Closets. Empty all closets completely, then vacuum the floor, wipe shelves, and check the ceiling corners for cobwebs. A closet left with a single forgotten item often results in an unexpected cleaning charge.
- Light switches and baseboards. These are the same detail work required in bedrooms, and they matter just as much in hallways. A damp microfiber cloth removes most grime efficiently.
- Outdoor areas. If your lease covers a porch, patio, balcony, or garage, those spaces need attention too. Sweep surfaces, remove all personal items, and clear any debris. You can find garage cleaning guidance that covers what landlords typically expect in those spaces.
- Trash and bins. Remove all trash bags and wipe down the inside of any trash bins that belong to the property.
5. How to prioritize, compare your options, and manage your time
Knowing what to clean is half the job. Understanding how to organize the work, and when to call in help, is what separates a tenant who gets their full deposit back from one who does not.
Cleaning order matters. Always start at the top of each room, working ceilings and light fixtures first, then walls and furniture surfaces, then floors last. This prevents dust and debris from falling onto areas you have already cleaned.
Hardest rooms first. Kitchen and bathrooms are the most time-consuming and the most scrutinized. Tackle them on day one of your cleaning process.
Check your lease before you start. Most leases require tenants to return the property in the same condition as move-in. Some leases specifically require professional carpet cleaning or window washing. Reviewing those clauses tells you exactly what is mandatory before you decide on DIY versus professional cleaning.
Here is a straightforward comparison to help you decide:
| Approach | Best for | Cost estimate | Effort required | Deposit risk |
|---|---|---|---|---|
| Full DIY | Smaller units in good condition | $20 to $60 in supplies | High | Moderate if thorough |
| Partial DIY + pro for carpets | Units with heavy carpet use | $80 to $150 | Medium | Low |
| Full professional service | Larger units or limited time | $150 to $300 | Very low | Very low |
Pro Tip: Give yourself at least five to seven days before your move-out date to clean. Rushed cleaning produces missed spots: streaky windows, dusty light fixtures, and unpatched walls that a landlord will find immediately.
What I have actually learned from move-out cleaning
I have watched tenants lose hundreds of dollars in deposit deductions over cleaning issues that a few extra hours and some planning would have prevented entirely. The pattern is almost always the same: people underestimate how long a real deep clean takes, then rush through it the day before they hand over the keys.
In my experience, the most overlooked spots are consistently the oven interior, the grout lines in the bathroom, and the inside of kitchen cabinets. Every inspector knows to check those areas. Tenants who ignore them pay for it.
What I think most people get wrong is treating move-out cleaning like a regular weekend clean. It is not. Every surface needs to be assessed. I have seen spotless living rooms paired with refrigerators that had food left inside, which cost the tenant their entire cleaning deposit. The property is judged as a whole.
Small repairs deserve the same respect as cleaning. Patching three nail holes takes 20 minutes and costs almost nothing. Leaving them costs you significantly more. These are the kinds of details that signal to a landlord whether a tenant respected the property.
My honest advice: start early, photograph everything, and be honest with yourself about whether your cleaning is actually meeting the standard you moved in to. If it is not, hiring professional help is not an admission of failure. It is the financially smart move.
— Steven
Let Octomaids handle the hard part
Moving out is already stressful without spending your last week on your hands and knees scrubbing grout. Octomaids has provided professional move-out cleaning services to tenants across Vancouver, WA and the Portland, OR metro area since 2006. Our family-owned team knows exactly what landlords look for, and we work through every area systematically so nothing gets missed.
Whether you need a one-time move-out cleaning service or want a detailed checklist to guide your own efforts, we have both covered. Our deposit recovery checklist walks tenants through every room with the same thoroughness our team brings on-site. Professional move-out cleaning typically costs between $150 and $300, which is far less than losing a $500 to $1,500 security deposit. If you are in Clark County WA or the Portland Metro area, reach out to Octomaids for a quote before your move-out date.
FAQ
What are the most important areas to clean before moving out?
The kitchen and bathrooms require the most thorough attention and are the most common sources of deposit disputes. Appliances, grout, tubs, and cabinet interiors are the spots inspectors check first.
How long does a move-out deep clean take?
A thorough move-out clean for a standard two-bedroom apartment typically takes six to ten hours. Starting at least five to seven days before your handover date prevents the rushed, incomplete work that leads to deductions.
Should I hire a professional cleaner or do it myself?
Professional move-out cleaning costs between $150 and $300 and is often the better financial choice if your lease requires professional services or if the unit has heavy soiling. For smaller units in good condition, a thorough DIY clean with the right products can achieve the same result.
Do I need to clean inside appliances before moving out?
Yes. Ovens, refrigerators, microwaves, and dishwashers all need to be cleaned inside and out. Food residue inside appliances is one of the most cited reasons landlords retain cleaning deposits.
How do I protect myself from unfair deposit deductions?
Take date-stamped photos of every room immediately after you finish cleaning. These photos create a clear record of the property’s condition at the time you left, which is your strongest protection against disputed charges.