Your security deposit is on the line, and the clock is running. A move out cleaning room by room guide gives you the structure to tackle every corner of your home without missing the spots that landlords actually check. Most tenants lose part of their deposit not because they skipped cleaning entirely, but because they cleaned randomly and left overlooked areas like baseboards, vents, and appliance interiors untouched. This guide walks you through every room with specific tasks, expert-backed sequencing, and practical tips that make the whole process manageable.
Table of Contents
- Key takeaways
- 1. How to prepare for your move out cleaning room by room guide
- 2. Kitchen cleaning: the room that makes or breaks inspections
- 3. Laundry area cleaning
- 4. Bathroom cleaning: standards that actually matter
- 5. Living room and bedroom cleaning
- 6. Final touches and overlooked areas
- My take on what actually makes move out cleaning work
- Let Octomaids handle the heavy lifting
- FAQ
Key takeaways
| Point | Details |
|---|---|
| Declutter before you clean | Remove all belongings before wet cleaning starts to assess the full scope and avoid redistributing dirt. |
| Tackle kitchens and bathrooms first | Starting with the hardest rooms preserves energy and ensures the most inspection-critical spaces get your best effort. |
| Zone-based cleaning prevents missed spots | Finishing one complete zone before moving on keeps mess contained and catches overlooked details like baseboards and vents. |
| Document your work with photos | Take timestamped photos after cleaning each room to protect yourself in any deposit dispute. |
| Professional help is a legitimate option | When time or complexity is a factor, hiring vacate cleaning services can be more cost-effective than losing a deposit. |
1. How to prepare for your move out cleaning room by room guide
Before you touch a sponge, you need to set yourself up. All decluttering must be completed before wet cleaning starts. If boxes are still stacked in corners or clothes are piled on closet floors, you cannot accurately assess how much cleaning labor each room actually needs. Clear everything out first, then assess.
Gather your supplies in one caddy or bucket that travels with you from room to room. You will need an all-purpose cleaner, a degreaser for the kitchen, a disinfectant for bathrooms, microfiber cloths, a scrub brush, a mop, a vacuum, and a squeegee for windows. Having everything in one portable kit means you never lose momentum hunting for a bottle you left in another room.
The sequence you follow matters more than most people realize. Kitchens and bathrooms require the most effort, so tackling them first ensures you bring full energy to the hardest jobs. Leaving them for the end is one of the most common mistakes renters make. By the time they get there, fatigue sets in and the cleaning quality drops.
Pro Tip: Use the zone method: treat each room as a complete zone and finish it entirely before moving to the next. Finishing one zone before moving on prevents mess from spreading and keeps you from feeling like you are working in circles.
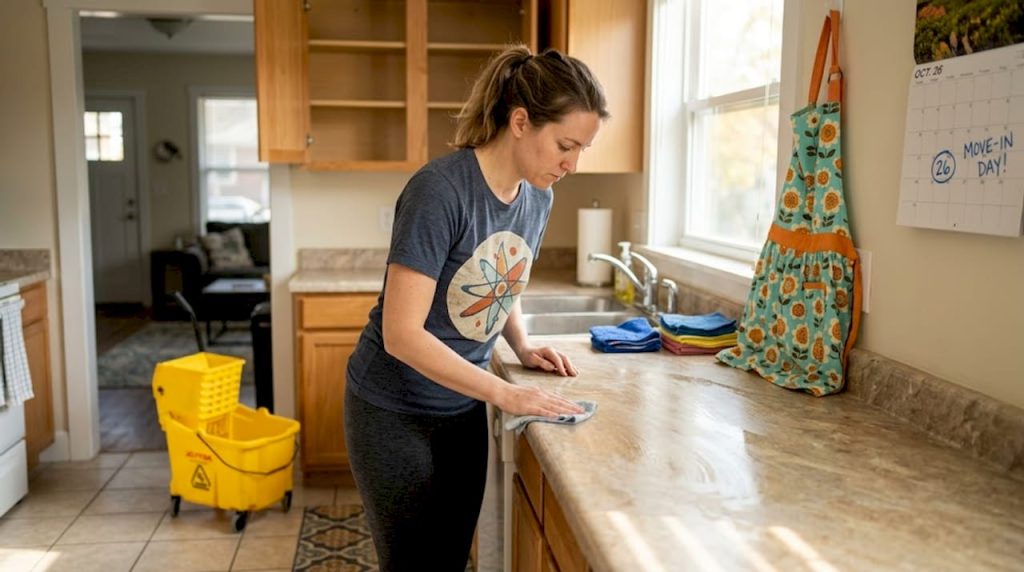
2. Kitchen cleaning: the room that makes or breaks inspections
The kitchen is the most scrutinized room in any rental inspection. Grease builds up invisibly on cabinet fronts, vents, and the areas behind appliances. Start at the top and work your way down.
- Countertops and cabinet fronts: Wipe countertops with a degreaser, then clean cabinet doors, handles, and the insides of any cabinets you used. Pay special attention to the area directly above the stove where grease splatters collect.
- Oven: Remove racks and soak them in hot, soapy water. Apply oven cleaner to the interior and let it sit while you clean other parts of the kitchen. Wipe down the oven door glass, the drawer underneath, and the control knobs.
- Microwave: Place a bowl of water with lemon slices inside and run it for two minutes. The steam loosens baked-on food and makes wiping the interior much easier. Clean the exterior and the filter if it has one.
- Refrigerator: Remove all shelves and drawers, wash them in the sink, and wipe down the interior walls. Clean the rubber door gaskets where mold hides, and pull the fridge out to vacuum the coils and mop behind it.
- Dishwasher: Running the hottest cycle with vinegar disinfects and deodorizes the interior effectively. Wipe down the door gasket and the control panel.
- Sink and garbage disposal: Scrub the sink basin, clean the faucet and handles, and run ice cubes with salt through the disposal to degrease and deodorize it.
Pro Tip: Soak stove burner grates in a sealed bag with a small amount of ammonia overnight before moving day. In the morning, the baked-on grease wipes right off with almost no scrubbing.
Finish by sweeping and mopping the floor, making sure you get the corners and the area under the toe kicks of the cabinets. Check how to clean rental appliances professionally if any appliance needs deeper attention than a standard wipe-down.
3. Laundry area cleaning
The laundry area gets overlooked constantly, but landlords and inspectors notice lint buildup and detergent residue quickly.
Run a washing machine cleaning cycle using a commercial tablet or two cups of white vinegar on the hottest setting. Wipe down the drum interior, the door seal where mold grows, and the detergent drawer. For front-loaders, leave the door propped open after cleaning to let the drum dry out completely.
The dryer needs a lint trap cleaning with a narrow vacuum attachment, and the interior drum should be wiped down with a damp cloth. Pull the dryer away from the wall to vacuum the vent hose and sweep up the lint that accumulates behind and underneath the unit. Mop the floor thoroughly, including the corners.
4. Bathroom cleaning: standards that actually matter
Bathrooms are the second most critical space in a rental inspection. The bar for cleanliness is high, and even small amounts of mildew or soap scum will get flagged.
- Toilet: Scrub the bowl with a toilet brush and a strong disinfectant cleaner. Wipe down the exterior of the tank, the base, and the area behind the toilet where dust and grime collect. Clean the seat, lid, and the hinges where buildup hides.
- Shower and tub: Apply a lime and mildew remover to the walls, floor, and any grout lines. Let it sit for at least ten minutes before scrubbing. Clean the showerhead by filling a bag with white vinegar, tying it around the head, and leaving it for an hour. Rinse and wipe down.
- Caulk lines: These are often the first thing a thorough inspector examines. If caulk is permanently stained with mildew, consider applying a fresh bead before you leave. It takes thirty minutes and looks dramatically cleaner.
- Faucets and mirrors: Use a microfiber cloth with a window cleaner for mirrors. For faucets with hard water buildup, wrap them in vinegar-soaked paper towels and let that sit for twenty minutes before polishing.
- Ventilation fan: Turn off the power at the breaker, remove the cover, and wash it in the sink. Vacuum the fan housing and wipe down the blades. A grimy vent cover stands out immediately in an inspection.
- Medicine cabinet and vanity: Empty completely, wipe the interior shelves, and clean the mirror if attached. Wipe down the vanity countertop and the inside of any drawers.
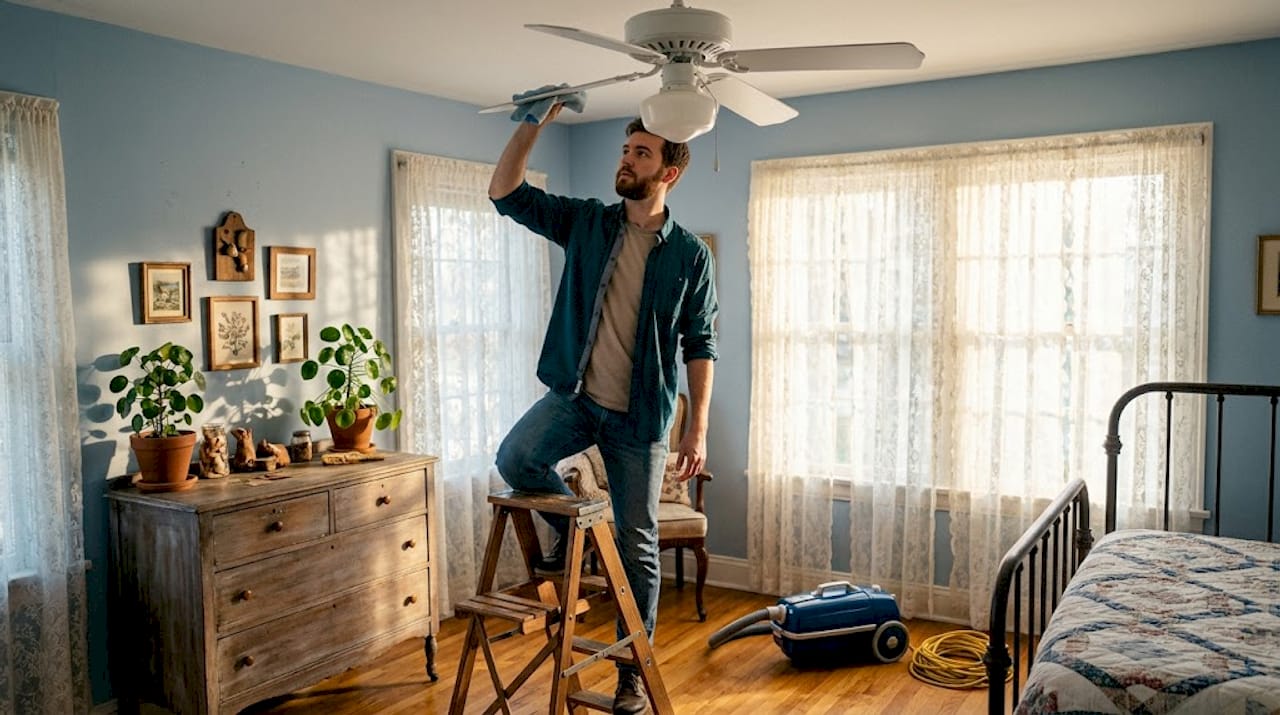
5. Living room and bedroom cleaning
These rooms feel less intense than the kitchen or bathroom, but they cover the most square footage and contain the most surfaces. A room-by-room approach keeps cleaning manageable and prevents the mental fatigue that comes from bouncing between spaces.
Work from top to bottom in every room. Dust ceiling fans, light fixtures, and the tops of shelves and door frames first. Any dust you dislodge falls to lower surfaces and the floor, which you clean last.
For walls, spot clean scuffs with a white magic eraser or a damp cloth with a small amount of dish soap. Landlords often charge significant amounts for repainting rooms where visible marks were not addressed. Patch any nail holes with spackling compound, let it dry fully, and sand it smooth before touching it up with matching paint.
Vacuum carpets in two directions, especially in high-traffic areas near doorways. Move furniture to vacuum underneath and check for any stains that need pretreating before your final vacuum pass. For hardwood or vinyl floors, mop with the product appropriate for that specific floor type to avoid streaking or surface damage.
Clean inside closets completely, including the floor and any shelves. Wipe down the closet rod and the back wall.
6. Final touches and overlooked areas
These are the details that separate a thorough clean from one that still costs you part of your deposit.
- Baseboards and door frames: These spots accumulate dust and grime that most renters completely overlook. Wipe them with a damp microfiber cloth and dry immediately.
- Light switches and outlet covers: Wipe every switch plate in the home with a disinfectant wipe. These get touched constantly and show visible grime under bright inspection lighting.
- Windows: Washing windows inside and out improves perceived cleanliness significantly. Clean the glass, the sills, and the tracks where dirt compacts.
- Air vents and returns: Remove vent covers and wipe them down. Vacuum visible dust from the duct opening as far as the attachment reaches.
- Doors and doorknobs: Wipe down every door surface, including the top edge where dust settles. Polish doorknobs and handles with a microfiber cloth.
- Garage and storage areas: Sweep thoroughly and wipe down any shelving. Remove everything, including small items left on shelves or in corners.
Pro Tip: After completing every room, take timestamped photos. Photos protect renters in deposit disputes by providing clear proof of the condition you left the space in.
| Area | Commonly missed detail | Quick fix |
|---|---|---|
| Kitchen | Tops of cabinets and refrigerator | Wipe with degreaser and microfiber cloth |
| Bathroom | Caulk lines and vent cover | Mildew remover and fan cleaning |
| Living spaces | Baseboards and door frame edges | Damp microfiber wipe-down |
| Windows | Sill tracks and window frame edges | Vacuum track, then wipe with damp cloth |
| Bedroom closets | Closet rod and back wall | Wipe with all-purpose cleaner |
My take on what actually makes move out cleaning work
I have been around enough move out situations to know that the people who stress the most are usually the ones who tried to clean everything at once without a plan. They walk from the bathroom to the kitchen to a bedroom, half-finishing each room, and by hour four they feel like they have worked hard but accomplished very little.
What actually works is committing to one room at a time and not leaving it until it is genuinely done. There is a psychological payoff to finishing a complete space that carries you forward. The room-by-room approach provides motivation that the scattered approach simply cannot match.
The other mistake I see consistently is underestimating the kitchen and bathroom. Renters will spend an hour vacuuming the bedroom and then spend fifteen rushed minutes on an oven with baked-on grease from three years of cooking. That calculus is backwards. Put your best energy into the spaces that are actually going to be examined most closely.
If you are pressed for time or the property has significant buildup, there is no shame in calling in professional end of tenancy cleaning. A good vacate cleaning service will often do in three hours what takes a tired renter an entire day. Your deposit is almost always worth more than the cost of professional help.
— Steven
Let Octomaids handle the heavy lifting
When you are juggling a move, the last thing you want is to spend two full days on your hands and knees scrubbing a rental. Octomaids has provided professional move in and out cleaning services to renters and homeowners throughout Vancouver, WA and the Portland metro area since 2006. Our family-owned team knows exactly what landlords and property managers look for during inspections.
Whether you need a one-time deep clean to prepare the space or want someone to handle specific high-effort areas like appliances and bathrooms, we build the service around what you actually need. You can also download our room-by-room deep cleaning checklist to use alongside this guide if you prefer to handle it yourself. If your situation calls for something more specific, our move out cleaning checklist for renters walks through every task tied directly to deposit recovery. Reach out and we will put together a plan that fits your timeline and your space.
FAQ
What does a move out cleaning checklist typically include?
A thorough move out cleaning checklist covers every room in the home, including appliance interiors, baseboards, window tracks, bathroom tile and grout, light fixtures, and wall scuffs. The goal is to return the property to the same condition it was in at move in.
How long does move out cleaning take?
For an average two-bedroom apartment, expect six to ten hours of thorough cleaning. Larger homes or units with heavy buildup in the kitchen and bathrooms can take significantly longer, which is why many renters choose to hire vacate cleaning services.
Should I clean before or after moving furniture out?
Clean after all furniture is removed. Cleaning an empty space is faster, more thorough, and lets you access walls, baseboards, and floor areas that furniture was covering. This is especially important when following a deep cleaning guide for move out.
What areas do landlords check most during move out inspections?
Landlords focus heavily on the kitchen (oven, fridge, and countertops), bathrooms (grout, toilet, and caulk lines), and any visible wall damage. Baseboards, vents, and door frames are also inspected closely and are among the most commonly missed spots.
Is it worth hiring professional move out cleaners?
In most cases, yes. The cost of professional end of tenancy cleaning is usually less than the deposit deduction for unsatisfactory cleaning. Professional cleaners also know inspection standards and work systematically through every room, which takes significantly less time than a solo effort.