
Moving out is stressful enough without the added anxiety of losing your security deposit over cleaning. A solid move out cleaning checklist for renters takes the guesswork out of the process and gives you a clear target to hit before handing back the keys. Landlords expect the property returned to move-in condition, and without a room-by-room plan, it is easy to miss the spots that inspectors notice first. This guide walks you through every area of your rental, from the kitchen to the closets, and covers the documentation steps that protect you if any dispute arises.
Table of Contents
- Key takeaways
- 1. Preparing for your move out cleaning
- 2. Kitchen cleaning checklist
- 3. Bathroom cleaning checklist
- 4. Living areas, bedrooms, and general spaces checklist
- 5. Final steps: inspection preparation and documentation
- My honest take on move-out cleaning after years in this industry
- Let Octomaids handle your move-out clean
- FAQ
Key takeaways
| Point | Details |
|---|---|
| Start with an empty unit | Clean only after all belongings are removed to avoid missing hidden dust and overlooked areas. |
| Kitchens and bathrooms need the most attention | These rooms face the highest scrutiny during inspections due to grease, soap scum, and hygiene concerns. |
| Document everything with photos | Timestamped before-and-after photos matched to your move-in records are your best defense in deposit disputes. |
| Keep all cleaning receipts | Professional cleaning invoices, especially for carpets, provide documentation that counters unfair deductions. |
| Know when to hire professionals | Professional move-out cleaning costs $200 to $500 but significantly reduces the risk of deposit deductions. |
1. Preparing for your move out cleaning
Before you touch a sponge, preparation makes the difference between a clean that passes inspection and one that misses critical spots. The single most important rule: clean after complete removal of all personal items. Furniture, rugs, and boxes create shadow zones where dust and debris accumulate unseen. Once the unit is empty, those hidden areas become visible and cleanable.
Here is what to gather and organize before you start:
- Cleaning supplies: All-purpose cleaner, degreaser, bathroom disinfectant, glass cleaner, baking soda, white vinegar, and microfiber cloths
- Tools: Scrub brushes, a mop and bucket, vacuum with attachments, a step stool for high surfaces, and a grout brush
- Lease review: Check your lease for specific requirements like professional carpet cleaning or window washing. Some leases mandate professional services regardless of condition.
- Cleaning order: Work top to bottom and room to room. Start with bedrooms, move through living areas, tackle the kitchen, finish with bathrooms, then do floors last in every room.
Pro Tip: Schedule your cleaning session for the day after your final move-out, not the night before. Rushing through a cleaning while boxes are still in the way leads to missed spots that cost you money.
2. Kitchen cleaning checklist
Kitchens are ground zero for deposit deductions. Deep degreasing and sanitization of kitchen surfaces directly impact whether you get your deposit back. Grease builds up on surfaces you stop noticing after months of cooking, and inspectors notice it immediately.
Work through every surface methodically:
- Refrigerator: Remove all shelves and drawers, wash them separately in warm soapy water, wipe down interior walls, clean the door gaskets, and pull the unit away from the wall to clean behind and underneath it
- Oven and stovetop: Use an oven degreaser on interior walls and racks, scrub burner grates, clean the drip pans, and wipe down the control panel and exterior surfaces
- Microwave: Clean interior walls, the turntable plate, the door seal, and the exterior including the top
- Dishwasher: Wipe down the door interior, clean the filter at the bottom, and run an empty cycle with a cleaning tablet if there is any odor or residue
- Countertops and backsplash: Degrease thoroughly, paying attention to the area directly behind the stove where splatter accumulates
- Cabinet fronts and interiors: Wipe down all exterior surfaces, then clean inside every cabinet and drawer, removing any crumbs or residue
- Sink and faucet: Scrub the basin, remove water spots from the faucet with a vinegar solution, and clean the drain
Pro Tip: For stubborn oven grease, apply oven cleaner the night before and let it sit overnight. A 15-minute job becomes a 5-minute wipe-down the next morning.
3. Bathroom cleaning checklist
Bathrooms are scrutinized just as heavily as kitchens during a tenant exit cleaning inspection. Soap scum, mildew, and limescale are the three main offenders, and they require specific cleaning approaches rather than a general wipe-down.
- Toilet: Scrub inside the bowl with a toilet brush and bowl cleaner, disinfect the seat, lid, tank, and base, and clean around the bolts at the floor
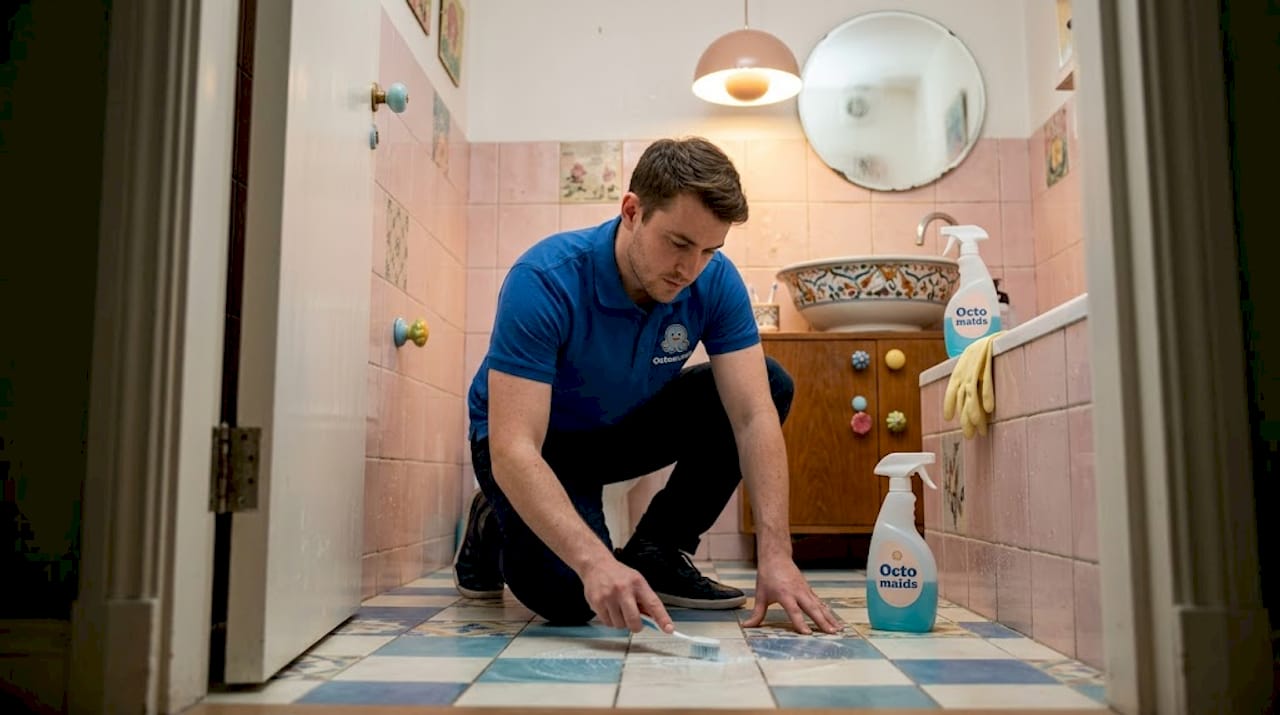
- Tub and shower: Apply a mildew remover or baking soda paste to grout lines and let it sit for 10 minutes before scrubbing. Use a grout brush for tile lines and a non-scratch scrubber for the tub surface. Remove and clean the drain cover.
- Shower door or curtain: Wipe down glass doors with a streak-free cleaner and remove any soap scum buildup. Replace the shower curtain liner if it has visible mildew.
- Vanity, sink, and faucet: Clean the countertop surface, scrub the sink basin, remove water spots from the faucet, and wipe down the cabinet interior
- Mirrors and glass: Use a glass cleaner with a microfiber cloth to avoid streaks
- Exhaust fan: Remove the cover, wash it, and use a vacuum attachment to remove dust from the fan blades inside the housing
- Floors and baseboards: Sweep, then mop with a disinfectant cleaner, and wipe down baseboards by hand to remove any buildup near the floor
The grout lines in a bathroom are what inspectors photograph first. If your grout looks gray when it should be white, a grout pen or a bleach-based cleaner applied with a small brush will restore it before your walkthrough.
4. Living areas, bedrooms, and general spaces checklist
These rooms feel less intense than kitchens and bathrooms, but they account for a surprising number of deposit deductions when renters skip the details. A thorough apartment move out checklist covers every surface from ceiling to floor.
- Light fixtures and ceiling fans: Dust blades and wipe down the fixture housing. Remove and wash any glass covers.
- Vents and registers: Vacuum dust from air vents and wipe down the covers with a damp cloth
- Walls and doors: Spot clean scuff marks and fingerprints with a magic eraser or mild cleaner. Pay attention to door frames, doorknobs, and light switch plates, which collect oils from hands over time.
- Window sills and tracks: Wipe down sills and use a vacuum attachment or old toothbrush to clear debris from window tracks
- Windows: Clean inside glass surfaces with a glass cleaner. If your lease requires exterior cleaning, address that separately.
- Closets and shelves: Wipe down all shelves, remove any hangers, and vacuum or sweep the closet floor
- Carpets: Vacuum thoroughly in multiple directions. Renters often miss dust under furniture and in corners when cleaning before moving out. If your lease requires professional carpet cleaning, schedule it after the unit is fully empty.
- Hard floors: Sweep first, then mop with the appropriate cleaner for the floor type. Hardwood floors need a wood-safe cleaner, not a wet mop.
Pro Tip: Walk through each room after cleaning and crouch down to eye level. Dust on baseboards and scuffs on lower wall sections are invisible when you are standing but obvious to an inspector scanning the room.
What professional cleaners notice in the first moments of entering a room is almost always something renters overlook: the smell, the ceiling fan, and the baseboards. Address those three things in every room and you have already covered the most common deduction triggers.
5. Final steps: inspection preparation and documentation
Cleaning the unit is only half the job. How you document and present that work determines whether you get your full deposit back or spend weeks disputing deductions. Side-by-side photo comparisons showing before and after conditions are effective evidence for renters, and they are easy to produce if you plan ahead.
Follow these steps after cleaning is complete:
- Request a walkthrough. Ask your landlord or property manager to do a joint walkthrough before your lease end date. Tenant presence during walkthroughs improves transparency and reduces disputes because issues can be addressed on the spot rather than debated later.
- Take timestamped photos of every room. Photograph each room from multiple angles, including inside appliances, cabinets, closets, and bathrooms. Match these to your original move-in photos if you have them.
- Use the same documentation format as your move-in records. Effective documentation matches the evaluation framework landlords use, so organize your photos by room and label them clearly.
- Keep all receipts. If you hired a professional cleaner or had carpets professionally cleaned, keep those invoices as evidence that the work was done to a professional standard.
- Return all keys and access devices. Include parking passes, mailbox keys, and garage openers. Leave a forwarding address in writing.
- Leave the unit as you found it. Check that no trash, personal items, or debris remain anywhere, including in storage areas, on balconies, and in parking spaces.
Pro Tip: Store your move-out photos in a cloud folder organized by date and room. If a dispute arises weeks later, you will have organized, timestamped evidence ready without searching through hundreds of photos on your phone.
My honest take on move-out cleaning after years in this industry
I have seen renters lose hundreds of dollars on deposits not because they were dirty tenants, but because they cleaned in the wrong order, rushed through it the night before handover, or simply did not know what inspectors actually look for.
The mistake I see most often is cleaning around furniture before it is moved out. You end up with a clean-looking apartment that has a ring of dust and debris exactly where every piece of furniture used to sit. That is what an inspector photographs. Clean after the unit is completely empty, and you eliminate that problem entirely.
The other thing I want to be direct about: some rentals genuinely need professional cleaning. Not because the tenant was careless, but because certain types of buildup, years of grease on an oven, heavy limescale on shower tiles, or deeply soiled carpet, require commercial-grade products and equipment that most people do not have at home. Professional cleaning costs $200 to $500, but when your deposit is $1,500 or $2,000, that math works out clearly in your favor.
The documentation piece is where I see the biggest missed opportunity. Most renters take a few photos and call it done. The renters who successfully dispute unfair deductions are the ones who documented methodically, using the same room-by-room format their landlord uses for inspection. Think of your photo set as a legal document, not a casual record.
Move-out cleaning does not have to be stressful. Treat it like a professional job, work through your checklist systematically, document everything, and you give yourself the best possible chance of walking away with your full deposit.
— Steven
Let Octomaids handle your move-out clean
Moving out involves enough logistics without spending a full day scrubbing an apartment you are trying to leave behind. Octomaids has been serving renters in Vancouver, WA and Portland, OR since 2006, and our move-out cleaning service is specifically designed to meet the standards landlords use during inspections.
Our team brings professional-grade supplies, works room by room through a thorough final cleaning checklist, and pays particular attention to the high-scrutiny areas where deposit deductions happen most: kitchens, bathrooms, and floors. We know what inspectors look for because we have cleaned thousands of rentals across Clark County and the Portland Metro area.
If you want the peace of mind that comes with a professionally cleaned unit and the documentation to back it up, explore our move-out cleaning services or check out our dedicated Vancouver WA deposit-back service. We also offer one-time deep cleaning for renters who need a thorough clean on a flexible schedule.
FAQ
What does a move out cleaning checklist for renters include?
A complete move out cleaning checklist covers every room in the unit, including appliance interiors, cabinet interiors, bathroom fixtures, windows, floors, and baseboards. It also includes documentation steps like timestamped photos and keeping professional cleaning receipts.
How long does move-out cleaning typically take?
A one-bedroom apartment takes roughly 4 to 6 hours for a thorough DIY clean after the unit is fully empty. Larger units or those with heavy buildup in kitchens and bathrooms can take 8 hours or more.
Should I hire professional cleaners when moving out?
Hiring professional cleaners is worth considering when your deposit exceeds $1,000, when your lease requires professional carpet cleaning, or when there is significant buildup in the kitchen or bathroom that standard household products cannot fully remove.
What areas do landlords inspect most closely?
Kitchens and bathrooms receive the most scrutiny during tenant exit cleaning inspections because of grease, soap scum, and hygiene concerns. Carpet condition and wall scuffs are also common sources of deposit deductions.
How do I protect myself if my landlord disputes the cleaning?
Timestamped photos matched to your move-in records, combined with receipts from any professional cleaning services, give you the strongest evidence to dispute unfair deductions. Request a joint walkthrough before your lease ends whenever possible.

