



That single method handles the majority of kitchen and bathroom grout staining most homeowners encounter.
Before you start, three things to know right now:
- Never mix bleach with hydrogen peroxide or vinegar. The chemical reaction produces toxic fumes. Use one product at a time, rinse thoroughly between methods.
- Spot-test every cleaner on a hidden section of grout and tile first, especially on natural stone like marble or travertine, where acidic or oxidizing cleaners can etch the surface permanently.
- **If grout stays gray after two rounds of proper cleaning, the sealer has likely failed or the staining is structural. Cleaning more aggressively won’t fix it. Grout colorant or regrouting is the next step.
Pro Tip: Dry grout always looks lighter than wet grout. Wait a full 30 minutes after rinsing before deciding whether the cleaning worked.
Key Takeaways
| Point | Details |
|---|---|
| Start with the paste | Mix two parts baking soda to one part 3% hydrogen peroxide; dwell 10–30 minutes before scrubbing. |
| Escalate carefully | Move to oxygen bleach before chlorine bleach; never mix chemicals, and always test on natural stone first. |
| Seal after every deep clean | Wait 24–48 hours after cleaning, apply two thin coats, and re-test with the water-bead method after curing. |
| Colorant when cleaning fails | If grout stays discolored after proper cleaning and drying, use a grout pen or Grout Renew before committing to regrouting. |
| Octomaids for the hard cases | Professional extraction, commercial oxygen cleaners, and sealer application are available through Octomaids in Vancouver, WA and Portland, OR. |
Table of Contents
- How to clean white grout with the baking soda and peroxide paste
- Graduated methods: from mild to strong, and when to use each
- What tools and supplies actually make a difference
- When cleaning won’t restore whiteness: colorants, pens, and regrouting
- How to test for sealer and reseal after cleaning
- Safety checklist and tile compatibility warnings
- Simple habits that keep grout white longer
- When it’s time to hire a professional
- What the scrubbing instinct gets wrong
- Octomaids handles the grout work you’d rather not do yourself
- Sources
- FAQ
How to clean white grout with the baking soda and peroxide paste
This two-ingredient grout cleaner is the go-to starting point recommended by cleaning experts. Baking soda acts as a mild abrasive that lifts debris from grout pores, while 3% hydrogen peroxide oxidizes organic stains like mold, mildew, and food residue. Together, they’re effective and far safer than jumping straight to bleach.
What you need:
- Baking soda (standard grocery-store box)
- 3% hydrogen peroxide (the brown bottle from any drugstore)
- A few drops of clear dish soap (for greasy kitchen grout only)
- Stiff nylon grout brush or old toothbrush
- Spray bottle with clean water
- Microfiber cloths
Step-by-step:
- Sweep or vacuum the area to remove loose dirt and debris from grout lines before applying anything wet.
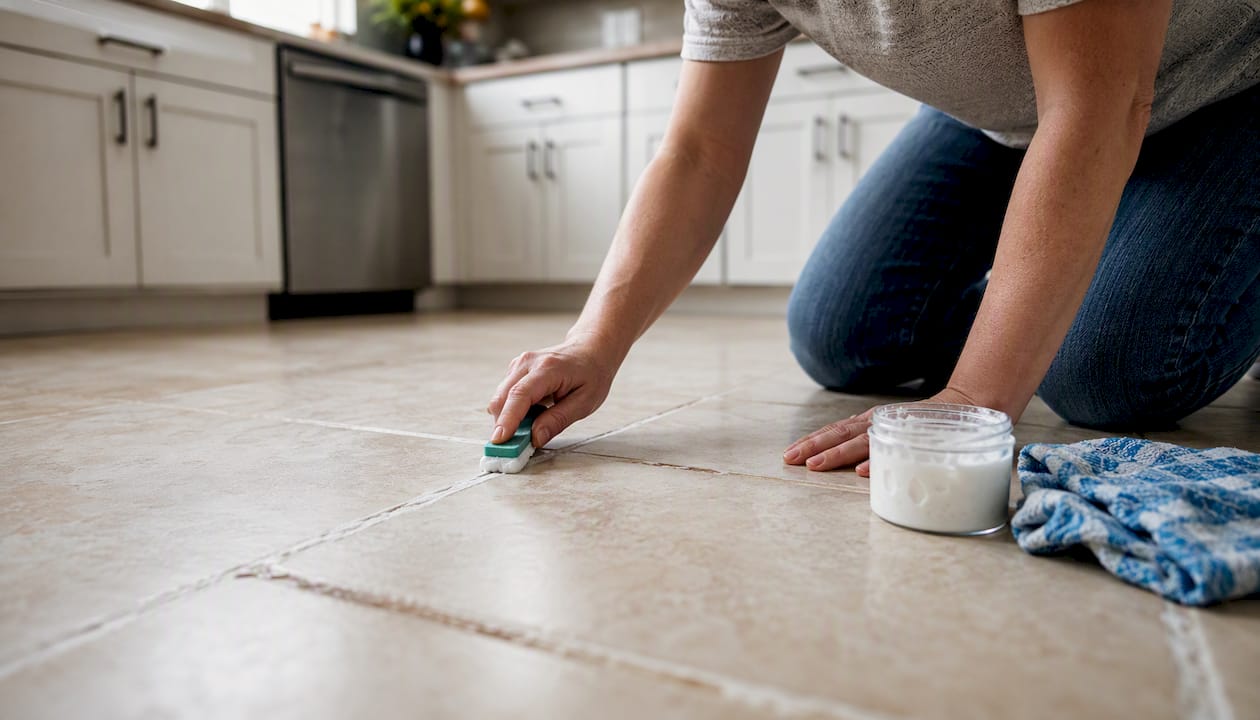
- Mix the paste: Combine two parts baking soda with one part 3% hydrogen peroxide in a small bowl. Stir until it forms a thick, spreadable paste. For kitchen grout with grease buildup, add three to four drops of clear dish soap to help emulsify oils.
- Apply the paste directly onto grout lines using a small foam applicator, old toothbrush, or your gloved fingertip. Work in manageable sections of two to three square feet.
- Let it dwell. For light staining, 10 minutes is enough. For darker or older stains, extend to 20–30 minutes. Keep the paste moist so it keeps working.
- Scrub in a circular motion with a stiff nylon brush. Short, controlled strokes work better than long aggressive ones. You’re agitating the paste into the pores, not grinding the grout down.
- Rinse thoroughly with clean water and wipe away residue with a microfiber cloth. Avoid letting dirty rinse water sit in the joints.
- Inspect after the grout dries completely (at least 30 minutes). Wet grout always reads darker than its true cleaned color.
Pro Tip: For stubborn stains, lay a damp paper towel over the paste after applying it. This keeps the paste from drying out and extends the active dwell time without requiring you to reapply. Repeat the treatment a second time rather than scrubbing harder on the first pass.
Graduated methods: from mild to strong, and when to use each
Starting with mild, pH-neutral options and escalating only when needed protects both the grout and the surrounding tile. Aggressive chemicals used too early can strip sealer, pit grout, and permanently damage natural stone finishes.
| Method | Best for | Natural stone safe? | Effort required | Notes |
|---|---|---|---|---|
| Hot water + pH-neutral cleaner + nylon brush | Fresh dirt, light film | Yes | Low | Start here every time |
| Baking soda + 3% hydrogen peroxide paste | Organic stains, mildew, yellowing | Test first | Moderate | Best DIY option for most cases |
| Oxygen bleach (OxiClean-type paste or soak) | Deep mold, set-in organic discoloration | Generally yes | Moderate | Breaks down organic matter; safer than chlorine bleach |
| Diluted chlorine bleach (1 part bleach : 10 parts water) | Surface mold on ceramic/porcelain only | No | Moderate | Whitens surface only; does not extract embedded soil |
| Professional steam or hot-water extraction | Embedded soil, failed sealer, large areas | Yes (with care) | Low for homeowner | Most thorough; removes soil rather than redistributing it |
A few critical compatibility notes:
- Ceramic and porcelain tile tolerate most of these methods, including diluted chlorine bleach.
- Natural stone (marble, limestone, travertine) reacts badly to acidic cleaners, including white vinegar and some oxygen-bleach formulas. Stick to pH-neutral products and test before applying anything else.
- Colored grout can fade with repeated chlorine bleach use. Oxygen-based cleaners are the safer choice for how to clean colored grout without stripping pigment.
Safety rules that are non-negotiable:
- Never mix chlorine bleach with hydrogen peroxide, vinegar, or ammonia-based cleaners.
- Work in a ventilated space. Open windows, run the exhaust fan, and take breaks.
- Wear rubber gloves and eye protection whenever you use bleach or oxygen cleaners.
- Professionals prefer oxygen-based cleaners for deep mold because they break down organic matter rather than just bleaching the surface white.
When two rounds of the peroxide paste and one round of oxygen bleach haven’t restored the color, stop escalating. More chemical exposure won’t fix a sealer failure or structural staining.
What tools and supplies actually make a difference
The right brush matters more than most homeowners expect. A stiff nylon grout brush concentrates scrubbing force directly on the narrow grout joint without scratching adjacent tile. An old toothbrush works well for corners and small sections. What you want to avoid: wire brushes or abrasive metal pads, which can gouge grout and scratch glazed tile surfaces, opening up more pores for future staining.
Your core toolkit:
- Stiff nylon grout brush (look for “nylon bristles, designed for grout” on the label)
- Old toothbrush for tight corners and accent tiles
- Spray bottle for applying water and keeping paste moist
- Rubber gloves and safety glasses
- Microfiber cloths for rinsing and drying
- Small foam applicator or craft brush for applying paste or sealer
- Plastic scraper for removing dried paste or old sealer residue
- Wet/dry vacuum or a clean mop for rinsing large floor areas
- Knee pads if you’re working on floor grout for more than 20 minutes
A steam cleaner is genuinely useful for large tile floors or shower walls with heavy buildup. It loosens debris without chemicals and rinses clean quickly. For a single bathroom, it’s probably overkill unless you already own one. A $5 nylon grout brush from a hardware store handles most jobs just as well when paired with the right cleaner and enough dwell time.
Pro Tip: pH-neutral cleaners are labeled specifically for stone and tile. If the label says “safe for marble” or “pH-balanced,” it’s the right choice for any surface you’re unsure about.
When cleaning won’t restore whiteness: colorants, pens, and regrouting
If grout remains gray or discolored after thorough cleaning and full drying, the problem is usually one of two things: the sealer has failed and the grout has absorbed deep staining, or the grout itself is structurally compromised. Cleaning alone often fails when the sealer has failed; in those cases, color sealing or regrouting is the appropriate next step.
Decision flow:
- Clean with baking soda + peroxide paste. Dry fully and assess.
- If still discolored, try an oxygen bleach soak. Dry and assess again.
- Do the water-bead test (described in the next section). If water soaks in immediately, the sealer has failed.
- If grout is clean but dull or slightly off-white, a grout colorant or grout pen can restore the appearance.
- If grout is cracked, powdery, missing in sections, or persistently stained even after professional extraction, regrouting is the right fix.
Grout pens and colorants (Grout Renew, grout pens):
- Clean and dry the grout completely before applying. Any moisture or residue will prevent adhesion.
- Allow 24–48 hours of drying time after the final cleaning before applying colorant.
- Apply in thin coats, following the manufacturer’s direction for number of coats and curing time.
- Grout pens work well for narrow joints and touch-ups. Brush-on colorants like Grout Renew cover larger areas more evenly.
- Lifespan varies from several months to a few years depending on foot traffic, moisture exposure, and whether a sealer is applied over the colorant.
Grout pens and colorants can restore white appearance quickly, but they may peel over time in high-moisture areas like showers. They’re a practical medium-term fix, not a permanent one.
When regrouting makes more sense:
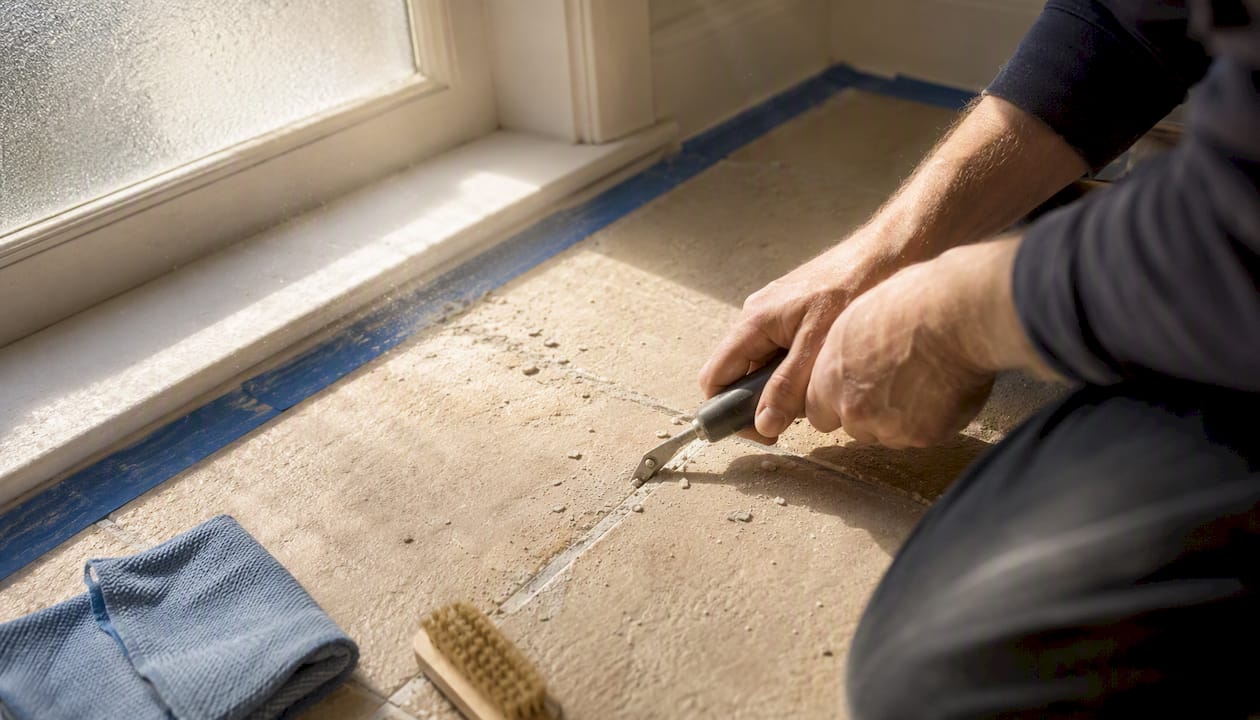
Regrouting is the permanent solution when grout is cracked, powdery, missing, or when staining persists even after professional hot-water extraction. Expect to protect adjacent tile with painter’s tape, remove old grout with a grout saw or oscillating tool, and apply new grout in sections. It’s a half-day to full-day project for an average bathroom, and the result lasts years when properly sealed.
How to test for sealer and reseal after cleaning
Sealing is the step most homeowners skip, and it’s why grout stains so quickly after cleaning. A properly sealed grout line repels water and oils at the surface rather than absorbing them into the porous cement matrix.
The water-bead test:
Drop a few drops of water onto a dry grout line. If the water beads up and sits on the surface, the sealer is intact. If it soaks in within 30 seconds, the sealer is gone or nearly depleted and resealing is overdue.
Step-by-step resealing process:
- Complete all cleaning and allow grout to dry for at least 24 hours. For newly installed or freshly regrouted joints, wait 48–72 hours.
- Run the exhaust fan and open windows before you start.
- Apply sealer in small sections (two to three square feet at a time) using a small foam applicator or the applicator tip on the bottle.
- Let the sealer penetrate for the time specified on the label, typically 5–15 minutes.
- Wipe away all excess sealer with a clean microfiber cloth before it dries on the tile surface. Dried sealer leaves a hazy film that’s difficult to remove.
- Apply a second coat using the same method. Skipping the second coat reduces protection by roughly 40–50% according to practitioner guidance. Two thin coats outperform one heavy application.
- Allow full curing time before exposing the surface to water (typically 24–72 hours depending on the product).
- Re-test with the water-bead test after curing to confirm coverage.
Recommended sealers: Penetrating sealers like Aqua Mix Sealer’s Choice Gold and Miracle Sealants 511 Impregnator are widely used by professionals and available at most tile and home improvement stores. Both work on cement-based grout and most natural stone. Note that epoxy grout is non-porous and does not require sealing.
One important warning: sealing dirty or damp grout traps stains underneath and creates a milky haze that’s nearly impossible to remove without stripping the sealer entirely. Clean first, dry completely, then seal. Avoid common sealer application mistakes like applying too much product at once or skipping the wipe-down step.
Safety checklist and tile compatibility warnings
Cleaning products that work well on ceramic tile can permanently damage natural stone. A few minutes of preparation prevents costly mistakes.
PPE checklist before you start:
- Rubber or nitrile gloves (not thin latex)
- Safety glasses or goggles when using bleach or oxygen cleaners
- Open windows and run the exhaust fan throughout the cleaning process
- Take a fresh-air break every 20–30 minutes when working with bleach or oxygen cleaners in enclosed spaces
Tile and surface compatibility:
- Marble, travertine, limestone: Avoid all acidic cleaners, including white vinegar, citrus-based cleaners, and some oxygen-bleach formulas. Acid etches the calcium carbonate in these stones, leaving dull spots that can’t be buffed out without professional honing.
- Ceramic and porcelain: Tolerate most cleaners, including diluted chlorine bleach. Still avoid metal brushes and abrasive pads on glazed surfaces.
- Colored grout: Chlorine bleach can strip pigment with repeated use. Oxygen-based cleaners are the safer choice.
- Adhesives and caulk: Chlorine bleach can degrade silicone caulk and some tile adhesives over time. Limit exposure and rinse thoroughly.
If a harsh cleaner contacts skin or an unintended surface:
Rinse the skin immediately with cool running water for at least 10 minutes. For tile surfaces, flush with clean water and neutralize any bleach residue with a diluted baking-soda rinse (one tablespoon per quart of water). Ventilate the space immediately if fumes become noticeable.
Spot-test every cleaner on a small, hidden section of grout and tile before full application. No exceptions.
Simple habits that keep grout white longer
The best cleaning tip is the one that reduces how often you need to clean. Grout stains because moisture, soap residue, and organic material accumulate in porous joints over time. A few consistent habits interrupt that cycle before it becomes a scrubbing project.
- After every shower, run the exhaust fan for at least 15 minutes and use a squeegee on shower walls. This removes the soap film and moisture that feed mold and mildew.
- Wipe kitchen floor grout spills immediately. Cooking oils and food residue are the hardest stains to remove once they’ve set into unsealed grout.
- Weekly: Spot-clean visible discoloration with a pH-neutral cleaner and a nylon brush. Catching stains early means 60 seconds of scrubbing instead of 30 minutes.
- Monthly: Do a light scrub of all grout lines with a pH-neutral cleaner. Inspect for cracks, missing sections, or areas where grout looks powdery or chalky.
- Every month: Do the water-bead test on a grout line in the shower and kitchen floor. If water soaks in, reseal before the next cleaning cycle.
- Every 1–3 years: Reseal all grout, depending on traffic and the sealer product used. High-traffic floors and shower floors need resealing closer to annually. Low-traffic bathroom walls can go two to three years between applications. Check grout protection ideas for your home for long-term maintenance strategies by surface type.
- Use a doormat at every entry point to reduce tracked-in dirt on floor grout.
- Mop with clean water. Dirty mop water redistributes soil into grout joints and accelerates re-soiling. Change the water frequently.
When it’s time to hire a professional
Some grout problems are genuinely beyond what DIY cleaning can fix, and recognizing that threshold early saves time, money, and tile damage.
Signs that professional intervention makes sense:
- Grout remains gray or discolored after two proper cleaning attempts with escalating methods
- Visible mold growth that extends below the grout surface (black staining that doesn’t respond to oxygen bleach)
- Grout that feels gritty, chalky, or crumbles when touched, indicating structural failure
- Large areas of missing or cracked grout that need removal and replacement
- Sealer that has failed across an entire floor or shower enclosure
- Physical limitations that make floor scrubbing difficult or unsafe
What professionals do differently:
Professional cleaners use controlled agitation with stiff nylon brushes followed by hot-water extraction, which physically removes the dirty solution from the grout joint rather than letting it resettle. That distinction matters: repeated scrubbing without extraction often leaves grout looking gray because the dirty slurry settles back into the pores as it dries. Professionals also have access to commercial-grade oxygen cleaners used at precise dilutions, and they assess whether color sealing or regrouting is the right next step before recommending it. Understanding what professional cleaners do differently helps set realistic expectations for what a service visit can accomplish.
What to expect on a professional visit:
An inspection of the grout condition comes first, followed by a focused area-by-area cleaning sequence. The cleaner will identify zones that need colorant or regrouting and discuss options before proceeding. A typical bathroom grout cleaning takes one to two hours. Post-cleaning, a professional may apply a penetrating sealer or recommend a color-seal treatment if the grout has lost its original tone. Some cleaning tasks are simply worth hiring out when the time investment or physical effort outweighs the DIY savings.
Before a pro arrives:
Clear the area of rugs, toiletries, and floor items. Make sure the exhaust fan works. If you’ve recently applied a grout pen or colorant, let the cleaner know so they can adjust their approach.
What the scrubbing instinct gets wrong
Most homeowners approach stained grout the same way: scrub harder, use stronger chemicals, repeat. The instinct is understandable, but it’s usually counterproductive.
The real variable isn’t force. It’s dwell time and extraction. A cleaner that sits on grout for 20 minutes and is then rinsed away with clean water will outperform one that’s scrubbed aggressively for five minutes and wiped dry. The chemistry needs time to penetrate the pores and break down organic material. Scrubbing too early just moves the paste around without giving it time to work.
The second mistake is skipping the rinse. Dirty water left in grout joints dries and re-deposits soil, which is why grout sometimes looks worse after cleaning than before. Extraction, whether by wet/dry vacuum, thorough mopping with clean water, or a professional machine, is what actually removes the problem rather than redistributing it.
Pro Tip: Protect tile edges during longer dwell times by keeping the paste confined to the grout line. A small foam applicator gives you better control than a brush for the application step. If paste spreads onto polished stone tile, wipe it off immediately rather than letting it sit.
Octomaids handles the grout work you’d rather not do yourself
Scrubbing grout on your hands and knees is one of the most physically demanding cleaning tasks in any home. If the staining is extensive, the sealer has failed, or you simply don’t have the time, Octomaids has handled exactly this kind of job in the Vancouver, WA and Portland, OR area since 2006.

Our team brings professional-grade extraction equipment and commercial oxygen cleaners to jobs that home tools can’t fully resolve. Whether you need a one-time deep cleaning service to restore tile and grout before a sale, a move-in or move-out clean where grout condition affects your deposit, or recurring maintenance that keeps surfaces looking clean between your own efforts, we handle the full scope. The same trusted cleaners show up every visit, and every job is backed by our family-owned team’s 20-year track record in Clark County and the Portland Metro area. Request an estimate and let us assess what your grout actually needs.
Sources
- How to clean grout like a pro: Expert tips for tackling tough stains (and what to avoid) | Tom’s Guide
- Two-ingredient grout cleaner | Martha Stewart
- Cleaning pros explain how to clean grout without scrubbing | Good Housekeeping
- How to clean grout with baking soda and hydrogen peroxide | Real Simple
FAQ
What is the best grout cleaner for white grout?
For deeper staining, an oxygen-based cleaner like OxiClean applied as a paste or soak is the next step before reaching for chlorine bleach.
How can I whiten grout without scrubbing?
Apply an oxygen-based cleaner or the baking-soda and peroxide paste, then extend the dwell time to 20–30 minutes and keep the surface moist. Longer dwell time does more of the work than scrubbing does, and a thorough rinse with clean water removes the loosened soil.
Does white vinegar whiten grout?
White vinegar is acidic and can etch natural stone tile and degrade grout sealer over time. It may lift light surface residue on ceramic tile, but it doesn’t oxidize organic stains the way hydrogen peroxide does and is not recommended as a primary grout cleaner.
What do professionals use to clean grout?
Professionals typically use commercial-grade oxygen-based cleaners at controlled dilutions, applied with stiff nylon brushes and followed by hot-water extraction. The extraction step is what separates professional results from DIY scrubbing: it physically removes the dirty solution rather than letting it resettle into the grout joints.