


The fastest pantry fix for tarnished silver is the baking-soda and aluminum-foil hot-water bath. Line a heat-proof container with aluminum foil (shiny side up), dissolve about 1 tablespoon of baking soda per 4 cups of boiling water, submerge your silver so each piece touches the foil, and watch the tarnish migrate away in a few minutes. No scrubbing, no harsh chemicals, just kitchen chemistry.
That said, this method is not right for every piece. Skip it entirely for antiques, silver-plated items, anything with wood, bone, ivory, or glued handles, and pieces with intentional dark patina in the crevices. The same chemistry that lifts tarnish can strip a patina that took decades to develop.
Before you start any method: test on a small, hidden area first, rinse thoroughly with cool water after cleaning, and dry completely. Moisture left in seams or hollows is one of the fastest ways to invite new tarnish.
Key Takeaways
The baking-soda and aluminum-foil bath is the fastest, least-abrasive pantry method for everyday tarnish on plain sterling silver, but it should never be used on antiques, plated items, or composite pieces.
| Point | Details |
|---|---|
| Best method for most silver | The foil bath uses 1 tablespoon baking soda per 4 cups boiling water; soak a few minutes with each piece touching the foil. |
| Paste for spot cleaning | Mix 3 parts baking soda to 1 part water; rub in straight lines with a soft cloth and rinse thoroughly. |
| Know when to stop | Over-exposure beyond 3–5 minutes risks removing patina and causing pitting that cannot be reversed at home. |
| Items to protect | Never use home methods on antiques, silver-plated pieces, or anything with wood, bone, or glued components. |
| Octomaids for complex jobs | For heirlooms or large collections in Vancouver, WA and Portland, OR, Octomaids offers professional deep cleaning with careful handling. |
Table of Contents
- How to clean silver with baking soda using the foil bath
- When a baking-soda paste works better for spot cleaning
- Tackling stubborn tarnish with the boiling method
- Cleaning large trays, bowls, and serving pieces
- When you should not use baking soda on silver
- How to store silver so it stays clean longer
- Alternatives to baking soda: when to choose something else
- A local perspective from Octomaids
- When Octomaids can help with delicate household items
- Sources
- FAQ
How to clean silver with baking soda using the foil bath
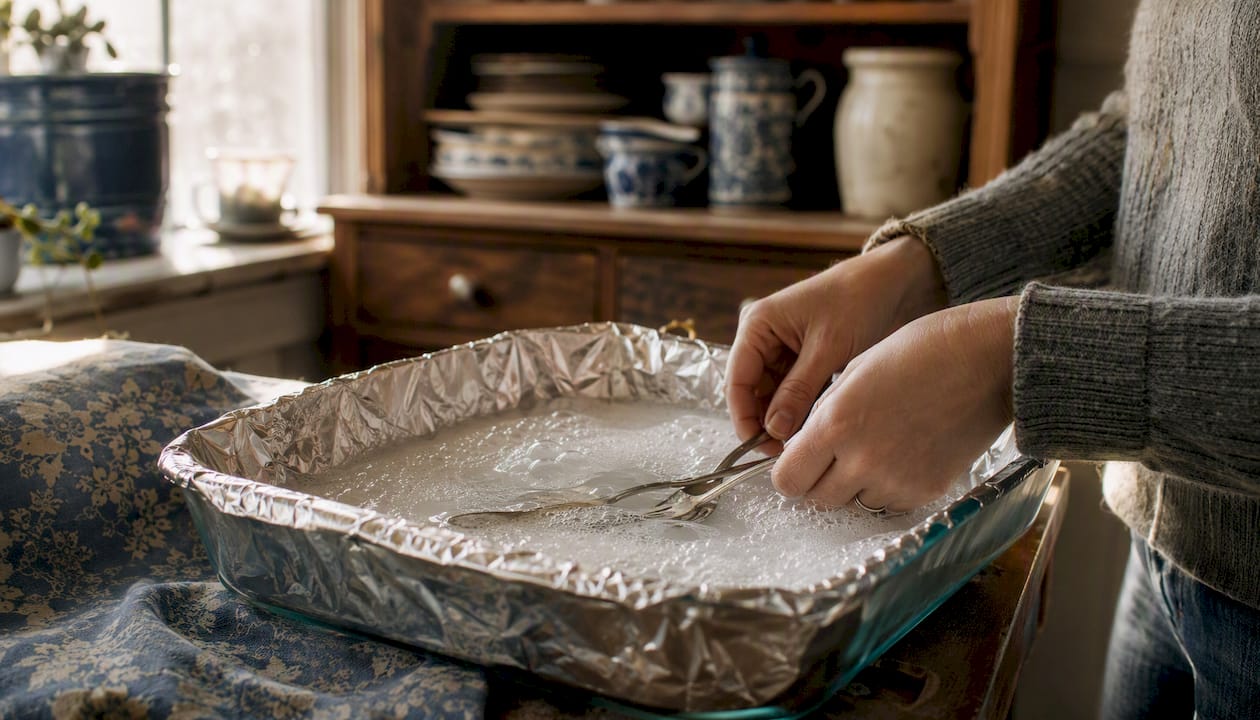
This electrochemical method works because of a straightforward chemical reaction. Silver tarnish is silver sulfide, a compound that forms when silver reacts with sulfur-containing compounds in the air. When silver contacts aluminum in a warm baking-soda solution, the aluminum acts as a reducing agent, pulling the sulfur away from the silver and bonding it to the aluminum instead. The result: your silver brightens, and the foil darkens. The Canadian Conservation Institute confirms this electrochemical reduction is effective for removing tarnish, though it notes the method is not appropriate for composite or high-value antique pieces.
What you need
| Item | Notes |
|---|---|
| Heat-proof container | Glass, ceramic, or stainless steel only |
| Aluminum foil | Shiny side facing up |
| Baking soda | About 1 tablespoon per 4 cups of water |
| Boiling water | Enough to submerge pieces fully |
| Salt (optional) | Speeds the reaction slightly |
| Soft microfiber cloths | For rinsing and buffing |
Step-by-step
- Line your container fully with aluminum foil, shiny side up.
- Lay silver pieces flat so each one touches the foil directly. Do not stack pieces on top of each other.
- Dissolve 1 tablespoon of baking soda (and salt if using) in 4 cups of boiling water, then pour the solution over the silver.
- Watch the reaction. Tarnish typically lifts within a few minutes. For heavier buildup, allow a bit longer, but check frequently.
- Remove pieces with tongs or a slotted spoon. The water and steam are hot.
- Rinse each piece under cool running water.
- Dry immediately and thoroughly with a soft cloth, then buff to a shine.
Pro Tip: Arrange flatware in a single layer with handles overlapping the foil edge so every tarnished surface stays in direct contact with the aluminum. Pieces that float or stack will clean unevenly.
When a baking-soda paste works better for spot cleaning
A paste is the right choice when you have a single piece, a detailed pattern, or a spot that needs targeted attention without a full bath. Mix roughly 3 parts baking soda to 1 part water until you have a thick, spreadable consistency. That ratio, widely documented in how-to sources, gives you enough abrasive action to lift tarnish without turning the paste too runny to control.
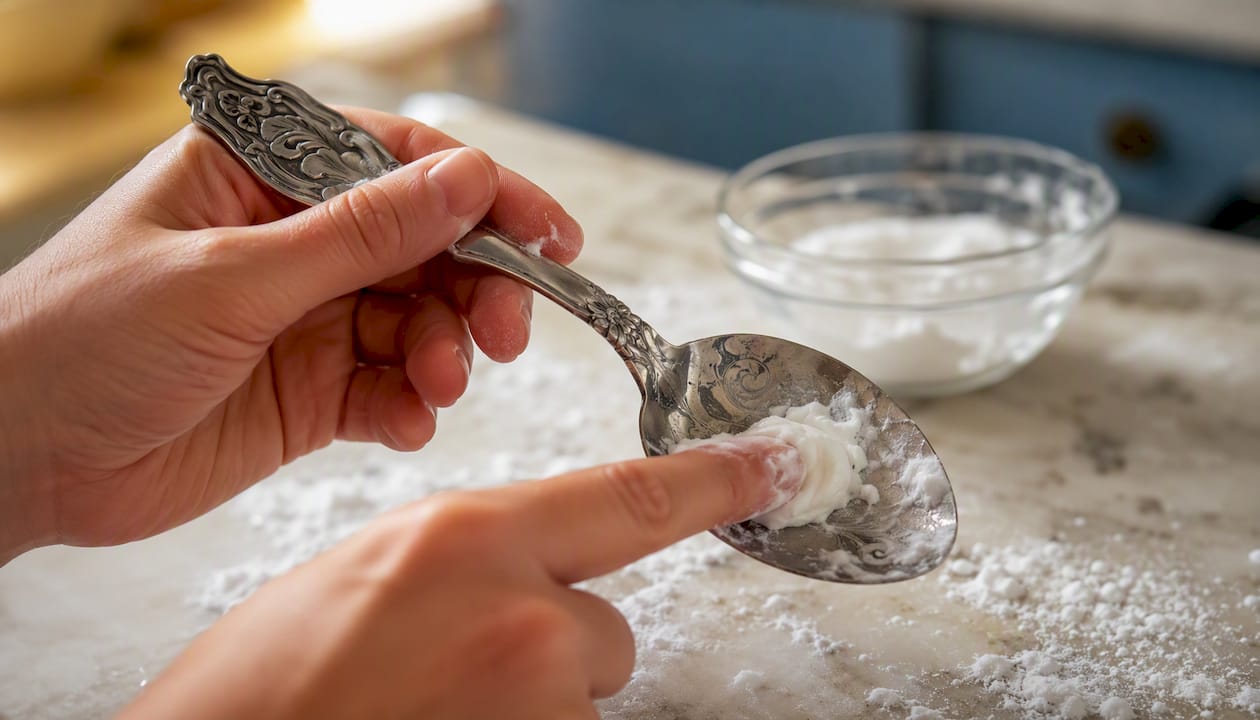
Application matters as much as the mix. Use a soft, lint-free cloth or a soft-bristled toothbrush, and rub in straight lines rather than circles. Circular motions leave fine-scratch patterns that catch light and look dull. Turn the cloth frequently so you are always working with a clean surface and not smearing loosened residue back onto the silver.
When paste beats the bath:
- Single items where setting up a full foil bath is impractical
- Pieces with intricate engraving or raised patterns where the bath may not reach every surface
- Situations where aluminum contact is not possible (e.g., a piece too large for any available container)
- Light tarnish that does not warrant the full bath setup
| Tarnish level | Recommended method |
|---|---|
| Light discoloration | Mild dish soap first; paste if soap is insufficient |
| Moderate tarnish | Baking-soda paste or foil bath |
| Heavy or widespread tarnish | Foil bath or boiling method |
Rinse the paste off completely under cool water, dry immediately, and buff with a microfiber cloth. Stop as soon as the shine returns. Over-polishing removes a thin layer of silver each time, and that loss adds up.
Tackling stubborn tarnish with the boiling method
When tarnish is thick, dark, and unresponsive to a standard foil bath, a higher-heat boiling method can break through. Martha Stewart’s DIY approach calls for 1/2 to 1 cup of baking soda and 1/2 cup of salt added to a pan of hot water, with silver submerged and the pan brought to a gentle boil. Follow one tested recipe rather than combining proportions from multiple sources, since the underlying chemistry shifts with different concentrations.
- Line a large stainless-steel or enamel pan with aluminum foil, shiny side up.
- Add water, baking soda, and salt in the proportions above.
- Bring to a gentle boil on the stovetop.
- Lower silver pieces into the water using tongs, ensuring each piece contacts the foil.
- Simmer for 3–5 minutes, watching closely. Remove sooner if tarnish clears.
- Lift pieces out carefully with tongs. Steam burns happen fast.
- Rinse under cool water, dry thoroughly, and buff.
Safety notes: Ventilate the kitchen. Use heat-safe gloves or long-handled tongs. Never use this method on hollow items, pieces with soldered joints, or anything with nonmetal components. The boiling water can force its way into seams and cause damage that no amount of polishing will fix.
Cleaning large trays, bowls, and serving pieces
A standard pot won’t fit a large serving tray. For oversized or awkward pieces, adapt the foil-bath principle to whatever container works.
- Line a clean sink: Cover the entire basin with aluminum foil, shiny side up, then lay the piece flat on top. Pour a hot baking-soda solution over it and let it soak.
- Use a glass baking dish: For medium-sized bowls or platters, a large Pyrex dish lined with foil works well and lets you monitor the reaction through the glass.
- Wrap the piece: For items too large for any container, wrap them snugly in aluminum foil, then submerge the wrapped piece in a warm baking-soda solution in a bucket or tub. The foil stays in contact with the silver throughout.
Start with a short soak of 3–5 minutes and inspect the surface before continuing. Large pieces have more surface area, and patina loss can happen faster than you expect. Once the tarnish is gone, rinse with cool water, dry every surface and seam thoroughly, and finish with a clean polishing cloth if the surface looks dull.
When you should not use baking soda on silver
The Canadian Conservation Institute is direct on this point: electrochemical methods can remove tarnish but are not appropriate for composite items or pieces with intentional dark oxidation in crevices. Improper cleaning can cause over-cleaning and pitting.
The risk is permanent. Pitting and micro-scratches from abrasive household methods cannot be reversed at home. For antiques, heirlooms, or pieces with decorative dark patina, a professional conservator is the right call.
Items that should not be treated with home baking-soda methods:
- Antique silver with age-related patina or collector value
- Silver-plated items (the plating is thin and abrasion removes it)
- Pieces with wood, bone, ivory, or glued handles (water and heat cause warping and separation)
- Coins (cleaning reduces numismatic value)
- Jewelry with porous gemstones, pearls, or glued settings
- Anything with soldered or hollow construction
The typical 3–5 minute window exists for a reason. Leaving silver in a baking-soda bath significantly longer than needed risks removing the very patina that gives antique and decorative pieces their character and their value. When in doubt, contact a professional conservator or reach out to a trusted local cleaning service with experience handling delicate household items.
How to store silver so it stays clean longer
The work you put into cleaning silver is only worth it if you slow down the re-tarnishing process. Tarnish forms when silver contacts sulfur compounds in the air, so the goal is to limit that exposure.
Immediate post-clean steps:
- Rinse in cool water and dry completely with a soft microfiber cloth.
- Pay attention to seams, hollows, and decorative grooves where moisture hides.
- Buff gently to a shine before storing.
Storage habits that make a real difference:
- Store silver in a cool, dry place, ideally in anti-tarnish cloth pouches or lined boxes.
- Add anti-tarnish strips to drawers or pouches; they absorb sulfur compounds before they reach the silver.
- Keep silver away from rubber bands, latex gloves, and certain treated papers, all of which off-gas sulfur and accelerate tarnish.
- Avoid storing silver near eggs, wool, or cosmetics containing sulfur compounds.
Everyday prevention:
- Wash silver with mild dish soap and warm water after each use, then dry immediately.
- Never leave silver air-drying; standing water speeds tarnish formation.
Pro Tip: Wear clean cotton gloves when handling freshly cleaned silver. Skin oils and trace sulfur from your hands transfer easily and create new tarnish spots within days.
Alternatives to baking soda: when to choose something else
Cleaning experts at Good Housekeeping recommend starting with the least abrasive option first: mild dish soap and warm water for light tarnish, and reserving paste or bath methods for heavier problems. Commercial silver polish is generally safer for long-term care, particularly for high-value pieces.
| Method | Best for | Trade-offs |
|---|---|---|
| Mild dish soap + warm water | Light maintenance, everyday care | Gentle; won’t remove heavy tarnish |
| Baking-soda paste | Spot cleaning, moderate tarnish | Slightly abrasive; effective in a pinch |
| Foil bath | Sets, flatware, heavy tarnish | Fast; not safe for composite or plated items |
| Commercial silver polish | High-value items, long-term care | Less abrasive; formulated to protect finish |
Some commercial polishes include tarnish inhibitors that slow re-tarnishing after cleaning, which pantry methods do not offer. For sterling silver jewelry or pieces you clean frequently, a quality commercial polish is worth the investment. Baking-soda methods are genuinely useful, but they are a stopgap, not a substitute for a proper care routine.
A local perspective from Octomaids
The question we hear most often is some version of: “Should I just do this myself?” For everyday flatware and lightly tarnished serving pieces, the answer is usually yes. The foil bath is safe, fast, and genuinely effective when used correctly on plain sterling.
Where I’d pump the brakes is with anything irreplaceable. Grandmother’s tea service, a set of antique serving spoons, or jewelry with sentimental and monetary value all deserve more caution than a kitchen experiment allows. Our team at Octomaids has handled delicate household items for homeowners across Vancouver, WA and Portland, OR since 2006, and the calls we get after a DIY cleaning gone wrong are always harder than the ones we get before. A professional cleaning approach accounts for material composition, finish type, and the kind of careful handling that protects value rather than risking it.
When Octomaids can help with delicate household items
Baking soda handles most everyday tarnish well. But if you have a large collection, composite pieces, or heirlooms you’d rather not risk, Octomaids offers one-time deep cleaning and specialty household services for homeowners throughout Clark County, WA and the Portland Metro area.

Our background-checked team brings the same careful attention to delicate items that we bring to every room in your home. Whether you’re preparing for a move, hosting a gathering, or simply want a trusted set of hands for the items that matter most, we’re here. Not sure if your cleaning task is worth hiring out? That’s exactly the kind of question we’re happy to answer. Reach out to Octomaids to book a service visit or get a quote for your home in Vancouver, WA or Portland, OR.
Sources
- Silver – Care and Tarnish Removal – Canadian Conservation Institute (CCI) Notes
- The Best Way to Clean Silver, per Experts
- How to Clean Silver with Baking Soda: A Step-by-Step Guide
For antique or high-value pieces, consult a professional conservator before attempting any home cleaning method.
FAQ
Is it safe to clean sterling silver with baking soda?
Yes, for plain sterling silver with no composite parts, glued handles, or intentional dark patina. Use the foil bath or paste method, keep soak time to 3–5 minutes, and rinse and dry thoroughly afterward.
What is the best homemade solution to clean silver?
The aluminum-foil and baking-soda hot-water bath is the most effective pantry method: 1 tablespoon of baking soda per 4 cups of boiling water, with silver in direct contact with the foil for 3–5 minutes.
How do you clean silver with baking soda the way Martha Stewart recommends?
Martha Stewart’s method uses 1/2 to 1 cup of baking soda and 1/2 cup of salt in a foil-lined pan of hot water. She notes the method can remove desirable patina and may cause pitting, so monitor closely and remove silver as soon as tarnish clears.
Will Dawn dish soap clean silver?
Mild dish soap like Dawn works well for light tarnish and everyday maintenance. It is the least abrasive option and a good first step before reaching for baking soda or a commercial polish.